DIY Craft Ideas for Adults
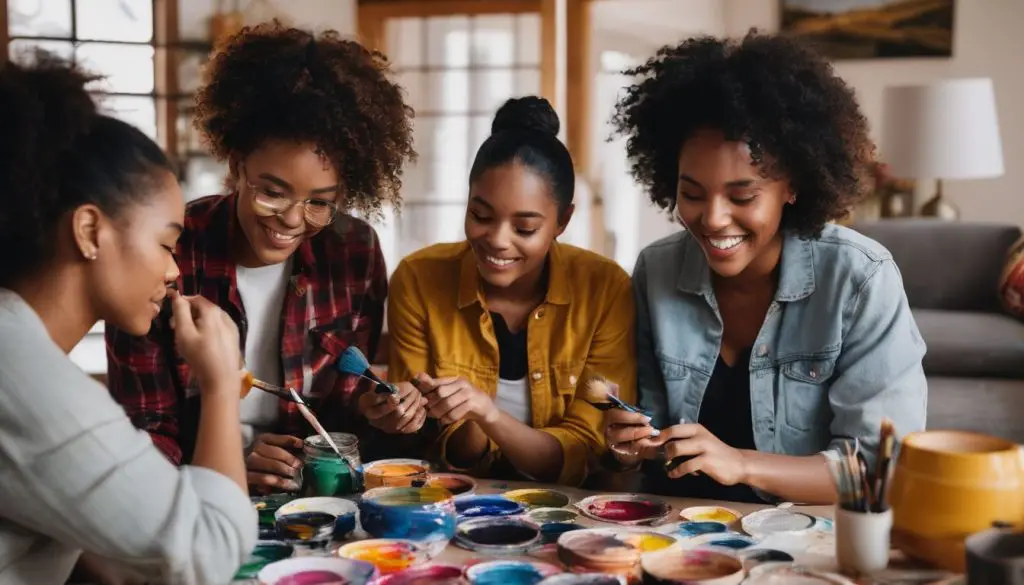
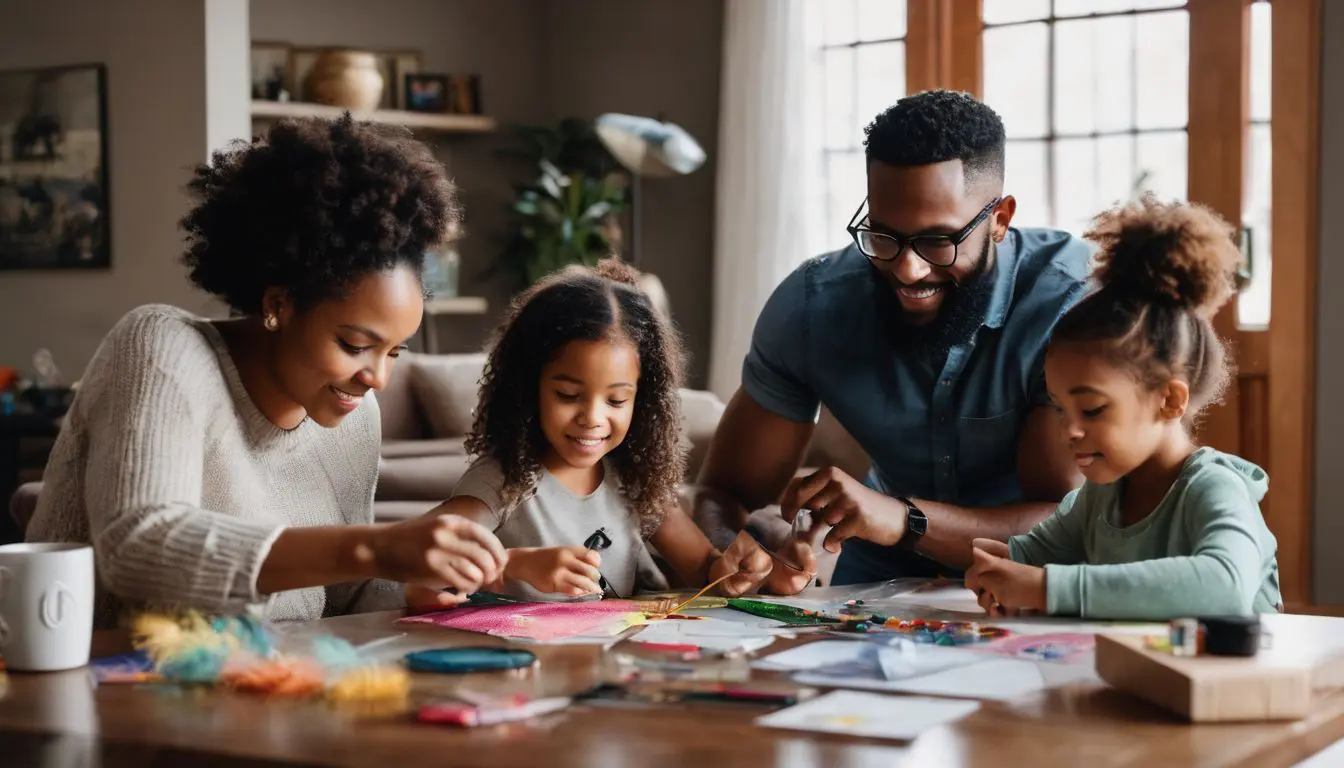
Feeling crafty but need help figuring out where to start? Crafting isn’t just for kids – adults can dive into the DIY world with projects ideally suited to their skill level and time constraints.
Our list of 21 creative craft ideas is packed with inspiration, guiding you from simple afternoon projects to masterpieces that spruce up your home. Get those hands ready—it’s crafting time!
Key Takeaways
- Crafting is not just for kids; adults can enjoy a wide range of DIY projects that match their skill levels and time availability.
- Upcycling everyday items like wine corks, magazines, and fabric scraps into unique crafts can decorate your home and also make thoughtful gifts.
- Mason jars can be transformed into elegant or colorful home décor pieces with simple materials like paint, lace, or paper.
- Personalized accessories such as flower headbands, monogrammed keychains, and washer necklaces are fun to make and add a special touch to any outfit.
- Handmade gifts created from the heart using photos, paints, yarns, or beads show care and thoughtfulness in a way store-bought items cannot.
Table of Contents
Selecting the Right DIY Craft Project

Diving into a DIY craft adventure? Smart move! But before you get your hands sticky with Mod Podge or sprinkled with glitter, pause—choosing the right project is critical.
It’s about striking that perfect match between what challenges you enough to keep things exciting and what’s doable without causing a furrowed brow.
Consider how much time you’re willing to invest; after all, some crafts can be conquered in an afternoon, while others might need a weekend or more dedicated creativity.
Now, let’s roll up those sleeves and transform everyday items into personalized masterpieces!
Considerations for Difficulty Level
Choosing a DIY craft fits like picking the right pair of shoes. It must match your skills and the time you have. Some crafts are marked easy, perfect for beginners, or if you want quick stress relief.
Jumping into these won’t take much time—a few minutes to an hour tops. If you’re ready for more, there are medium and pro levels, too!
These need steady hands, maybe Mod Podge or acrylic paint mastery, and can span from an afternoon to a couple of days.
Check out the project before you start. Look at what tools and materials it needs—do you have them all? Think about how long it will take to finish. Got a free weekend?
Try something challenging like a gourd birdhouse or macramé hangings! Only got an evening? Stick to simple pleasures like glass magnets or washi tape creations.
Ready for the next step? Let’s dive into crafting with time on our side: Time Commitment is up next!
Time Commitment
Every DIY craft comes with its time tag. Some projects fit into a quick half-hour slot, while others need a few hours over several days. It’s all about matching your schedule to the project’s demands.
Got only 20 minutes? Whip up some pom pom garlands. Ready for a weekend challenge? Dive into candle making.
Before you pick up that glue gun, check how much time you can spare. Easy crafts for adults can be squeezed in between work and life commitments—like crafting felt ball garlands during a TV show binge.
For longer projects, please plan to make sure they fit comfortably into your week without stress.
Upcycling Crafts for Adults

Upcycling isn’t just a crafty trend; it’s a creative testament to the adage, “One person’s trash is another person’s treasure.”
Dive into your recycling bin and discover how everyday items like wine corks or old magazines can transform into unique, personalized pieces that add charm to your space.
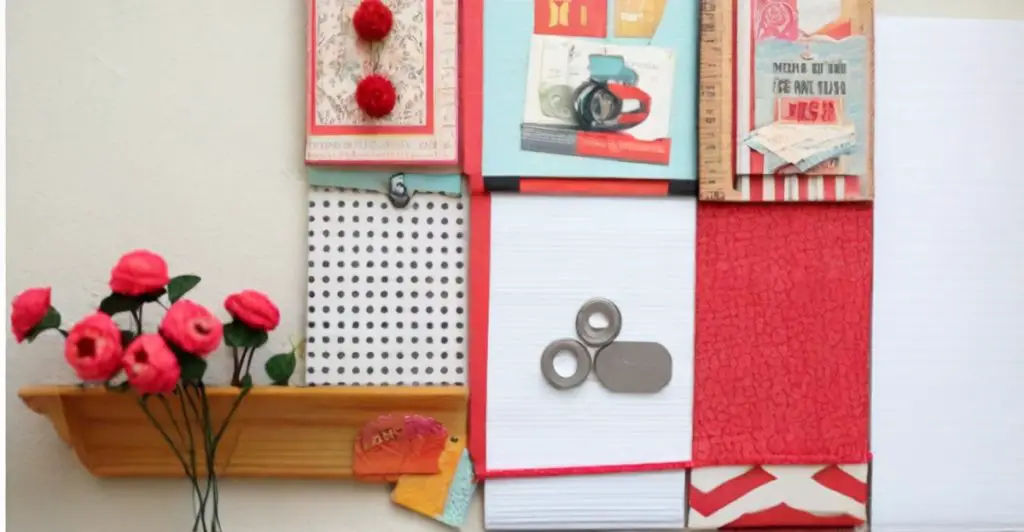
Photo Collage Letters
wooden or cardboard letters
unique collage
This craft turns memories into decorative art.
You can hang these letters on walls or prop them up on shelves. They make heartfelt gifts for friends and family, too.
Each letter tells a story with the pictures you choose — from laughter-filled vacations to cozy family gatherings.
Get creative and showcase the moments that mean the most to you!
1. Wine Cork Board
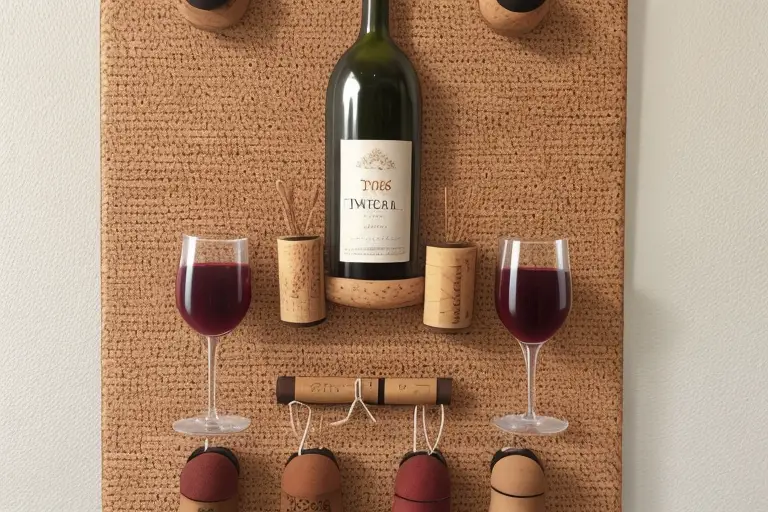
Creating a wine corkboard is a fun and eco-friendly DIY project. Follow this step-by-step guide to make your personalized corkboard using recycled wine corks:
Gather Materials:
- Collect a sufficient number of wine corks.
- Obtain a sturdy backing board, such as plywood or corkboard.
- Ensure you have a strong adhesive, a craft knife, and a ruler.
Prepare the Corks:
- Clean the wine corks thoroughly and let them dry.
- Cut some corks in half lengthwise for a flush surface.
Arrange the Layout:
- Plan the layout of your corks on the backing board.
- Consider creating patterns or designs for visual interest.
Glue the Corks:
- Apply adhesive to the back of each cork.
- Press them onto the backing board, following your planned layout.
Secure the Corks:
- Ensure the corks are firmly attached.
- Use heavy objects to weigh down the corks while the adhesive dries.
Trim Excess Corks:
- If needed, trim any excess cork extending beyond the board’s edges.
- Use a craft knife for precise cutting.
Optional Frame:
- Add a decorative frame around the corkboard for a finished look.
- Paint or stain the frame to complement your decor.
Hang and Enjoy:
- Once everything is dry and secure, hang your custom wine corkboard.
- Use it for pinning notes and photos or as a stylish wall decoration.
Now, you have a unique and functional wine corkboard to showcase your creativity and love for upcycling.
2. DIY coasters
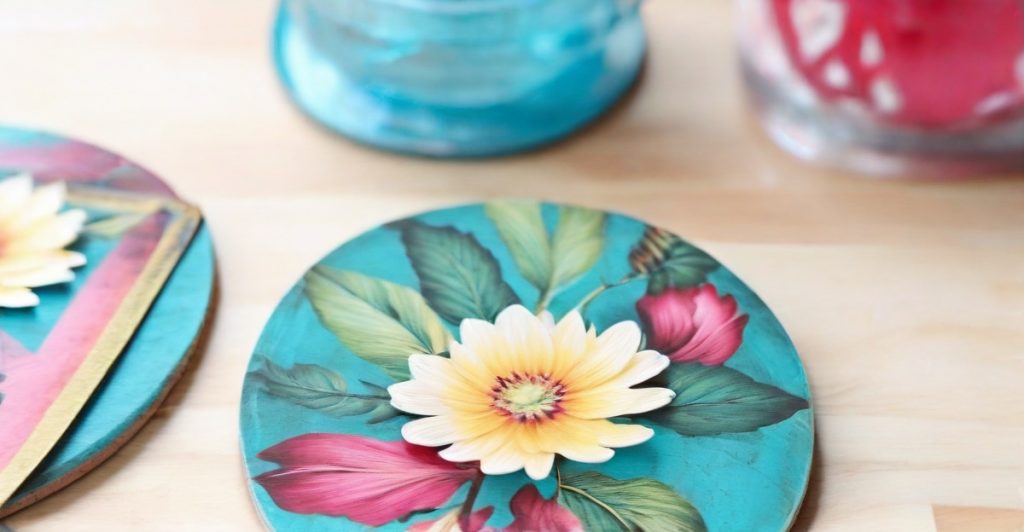
Creating your DIY coasters is a rewarding and straightforward project. Here’s a step-by-step guide to get you started:
Gather Materials:
- Collect materials such as tiles, cork sheets, or wooden blanks for your coaster base.
- Choose decorative elements like paper, fabric, or photos for customization.
- Acquire Mod Podge, adhesive, and a sealant for finishing.
Prepare the Coaster Base:
- If using tiles, ensure they are clean and dry. Sand wooden blanks if needed.
- Cut cork sheets to match the size of your coaster base.
Cut and Arrange Decorative Elements:
- Cut your chosen decorative elements to fit the coaster base.
- Arrange the elements in a pleasing design.
Apply Adhesive:
- Use Mod Podge or another suitable adhesive to attach the ornamental elements to the coaster base.
- Smooth out any air bubbles and let it dry.
Seal the Coaster:
- Apply a sealant or additional layers of Mod Podge to protect the design.
- Ensure thorough drying between each layer.
Add a Finishing Touch:
- Consider adding felt pads to the bottom of the coaster to cover surfaces.
- If desired, create a set with coordinating designs.
Personalize Further (Optional):
- Explore techniques such as resin pouring or decoupage for added personalization.
Enjoy Your Handmade Coasters:
- Once everything is dry and sealed, your DIY coasters are ready for use.
- Showcase your creativity or gift it to friends and family.
Now, you have a set of personalized coasters that not only serve a practical purpose but also reflect your unique style.
Upcycling old stuff
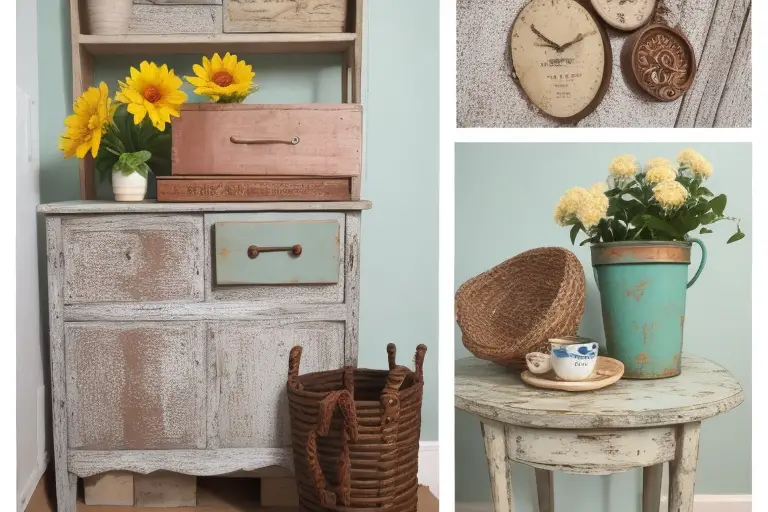
Upcycling old items is a sustainable and creative way to breathe new life into everyday objects. Here are some inspiring ideas to get you started:
- Repurposed Furniture:
- Turn old wooden pallets into stylish outdoor furniture or transform a ladder into a unique bookshelf.
- Use reclaimed wood to craft coffee tables, shelves, or headboards for a rustic touch.
- Clever Storage Solutions:
- Repurpose vintage suitcases into charming storage units or create wall-mounted shelves from old wooden crates.
- Convert unused wine crates into storage ottomans or hanging organizers.
- Vintage Decor Revival:
- Upcycle old window frames into decorative mirrors or photo frames.
- Give antique doors a new purpose as statement pieces for room dividers or tabletops.
- Fashionable Clothing Upcycling:
- Transform outdated or oversized clothing into trendy pieces by adding embellishments, embroidery, or adjusting the fit.
- Use old denim to craft stylish bags, purses, or even repurposed denim quilts.
- Kitchenware Reimagined:
- Turn vintage teacups into charming succulent planters.
- Transform unused mason jars into pendant lights or candle holders.
- Creative Art Projects:
- Use discarded books to create unique sculptures or wall art.
- Craft a DIY T-shirt stamp from an old takeout box for custom apparel designs.
- Garden Upcycling:
- Repurpose old tires into colorful planters or create a vertical garden using a wooden pallet.
- Use broken or chipped teacups and saucers as whimsical garden markers.
- Electronic Waste Makeover:
- Turn outdated computer monitors into funky aquariums or terrariums.
- Upcycle keyboard keys into personalized jewelry or keychains.
Remember, the key to successful upcycling is to let your creativity flow, seeing potential in items others might discard.
DIY Crafts for Home Décor
Transform your living space with handcrafted charm! DIY crafts for home décor allow you to infuse personality and style into every corner of your house.
Think elegant marbled mugs sipping coffee on a Sunday morning or a vibrant faux flower frame wreath welcoming guests at the door.
Ready to add that unique touch? Let’s dive into creating pieces that turn a house into YOUR home.
3. DIY Marbled Mugs
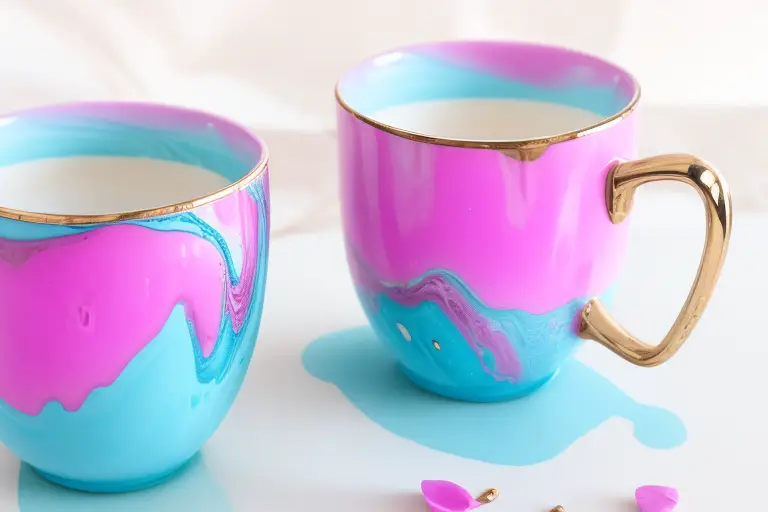
Creating marbled mugs is a fun and artistic DIY project. Here’s a step-by-step guide to achieving the marbled effect using nail polish:
- Gather Materials:
- Select plain ceramic mugs.
- Choose a variety of nail polish colors for the marbled effect.
- Have a disposable container, toothpicks, and warm water ready.
- Prepare the Workspace:
- Work in a well-ventilated area.
- Cover the work surface with newspaper or a disposable tablecloth.
- Fill the Container with Water:
- Fill the container with warm water deep enough to fully submerge the mug.
- Add Nail Polish:
- Drop nail polish onto the water’s surface, creating a floating layer.
- Create Marbled Design:
- Quickly use toothpicks to swirl and manipulate the nail polish on the water’s surface to create a marbled pattern.
- Dip the Mug:
- Hold the mug at an angle and gently dip it into the water, allowing the nail polish to adhere to the surface.
- Let It Dry:
- Allow the mug to dry completely before handling.
- Seal the Design (Optional):
- Consider using a clear sealant to protect the nail polish design.
- Enjoy Your Marbled Mugs:
- Once dry and sealed, your DIY marbled mugs are ready for use or gifting.
- Clean Up:
- Clean excess nail polish from the water’s surface before starting the next mug.
Experiment with different color combinations and techniques for unique designs. Remember to work quickly, as nail polish tends to dry fast on the water’s surface.
4. DIY Bulletin Board
Creating your bulletin board is a simple and rewarding DIY project. Here’s a step-by-step guide to help you make a customized bulletin board:
Gather Materials:
- Obtain a corkboard or a foam board as the base.
- Choose fabric, wrapping paper, or contact paper to cover the board.
- Collect decorative elements like ribbon, push pins, and any embellishments you desire.
Prepare the Base:
- If using a foam board, cut it to your preferred size.
- Lay the fabric or chosen covering on a flat surface.
Attach the Covering:
- Place the board on the fabric, ensuring there is excess fabric on all sides.
- Pull the fabric tightly around the board and secure it to the back using a staple gun or glue.
Trim Excess Material:
- Trim any excess fabric to create a clean and neat look.
Add Decorative Elements:
- Use ribbon to build a border around the board, securing it with glue or pins.
- Arrange and attach push pins or decorative elements in a pattern or design of your choice.
Personalize with Photos or Notes:
- Pin or attach photos, notes, or other items to make the board functional and personal.
Hang Your Bulletin Board:
- Install picture hangers or adhesive strips on the back for easy hanging.
Organize and Display:
- Use your new bulletin board to organize schedules and notes or display inspiring quotes.
Explore Creative Variations:
- Experiment with different fabrics, patterns, and layouts to suit your style.
Share Your Creation:
- Share your DIY bulletin board with friends or family and inspire them to create their own.
This DIY project allows for personalization, making it a functional and decorative addition to your space.
5. DIY Crafts with Paper
Unlock the hidden artist within as you dive into the world of paper crafting; there’s a whole universe of textures, colors, and techniques waiting to turn that humble sheet into something spectacular—keep scrolling, and let’s get those creative juices flowing!
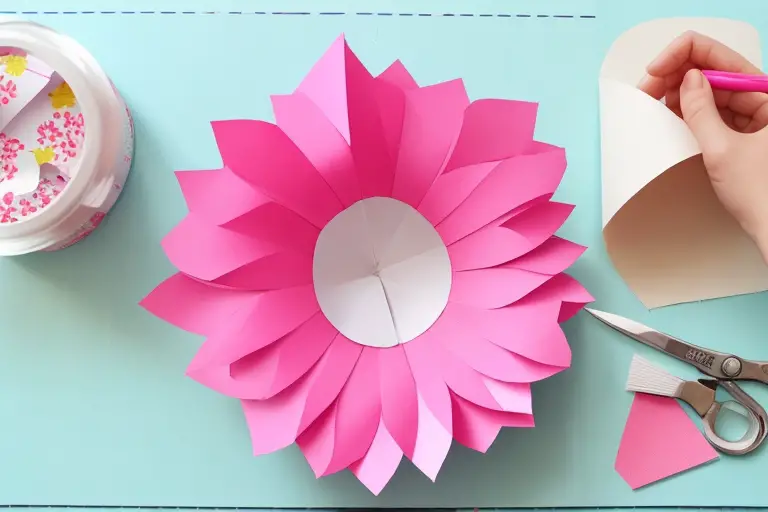
How to Make Paper Flowers
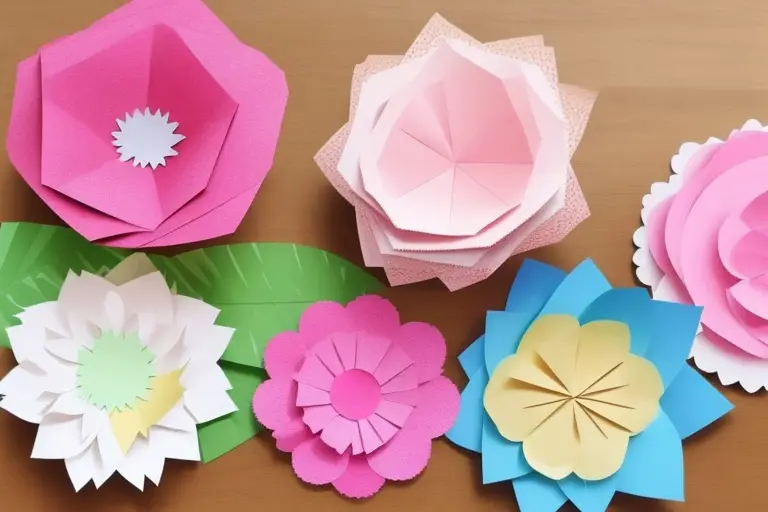
Creating beautiful paper flowers is a delightful and straightforward DIY project. Follow these step-by-step instructions to make your paper blossom:
Gather Materials:
- Collect the colored or patterned paper of your choice.
- Prepare scissors, glue, and a pencil.
Choose a Flower Design:
- Decide on the type of flower you want to create. Common choices include roses, daisies, or simple petals.
Cut Paper Strips:
- Cut paper strips of varying lengths and widths based on your chosen flower design.
Create Petals:
- Take each strip and form a loop, securing it with glue to create a petal.
- Repeat this process for all strips, adjusting sizes for diverse petals.
Construct the Flower:
- Arrange the petals in layers, gluing them together to form the flower.
- Experiment with different petal placements to achieve the desired look.
Add the Center:
- Create a small paper coil or ball for the center of the flower.
- Please attach it to the layered petals using glue.
Shape and Refine:
- Curl or shape the petals as needed to give the flower a natural appearance.
- Trim any excess paper for a polished look.
Repeat for Bouquet:
- Repeat the process to craft additional flowers, creating a bouquet if desired.
Explore Variations:
- Try different paper colors, sizes, and shapes to create a variety of flowers.
- Experiment with techniques such as folding or crumpling for unique textures.
Display Your Paper Flowers:
- Use your paper flowers for decorative purposes, such as table centerpieces, wall decor, or as a thoughtful handmade gift.
This DIY project allows for creativity and personalization, making it a charming and cost-effective way to add floral accents to your surroundings.
6. Magazine Collage
Creating a captivating magazine collage is a creative and enjoyable DIY project. Follow these step-by-step instructions to craft your unique magazine collage:
Gather Materials:
- Collect a variety of magazines with images and colors that inspire you.
- Prepare a canvas or sturdy paper as the base for your collage.
- Gather scissors, glue, and any additional embellishments you may want.
Select a Theme or Concept:
- Choose a theme or concept for your collage. It could be based on colors, emotions, or a specific subject matter.
Flip Through Magazines:
- Browse through the magazines and cut out images, words, and textures that align with your chosen theme.
Arrange and Organize:
- Organize the cutouts on your work surface before gluing. Experiment with different layouts until you find a visually appealing arrangement.
Glue Down the Elements:
- Begin gluing the cutouts onto the canvas or paper. Use a glue stick or craft glue for a secure hold.
Layer and Overlap:
- Create depth and interest by layering and overlapping the images. This adds dimension to your collage.
Add Personal Touches:
- Incorporate personal touches like hand-drawn elements, paint, or additional items to make the collage uniquely yours.
Fill the Entire Surface:
- Continue adding elements until the entire surface is filled. Be mindful of the overall balance and composition.
Let it Dry:
- Allow the collage to dry completely before handling or framing.
Optional Finishing Touches:
- Consider sealing the collage with a clear varnish or Mod Podge for protection and a polished finish.
Display or Frame:
- Once dry, display your magazine collage as a standalone piece or frame it for a professional touch.
This DIY project allows for self-expression and creativity, turning ordinary magazine images into a unique work of art.
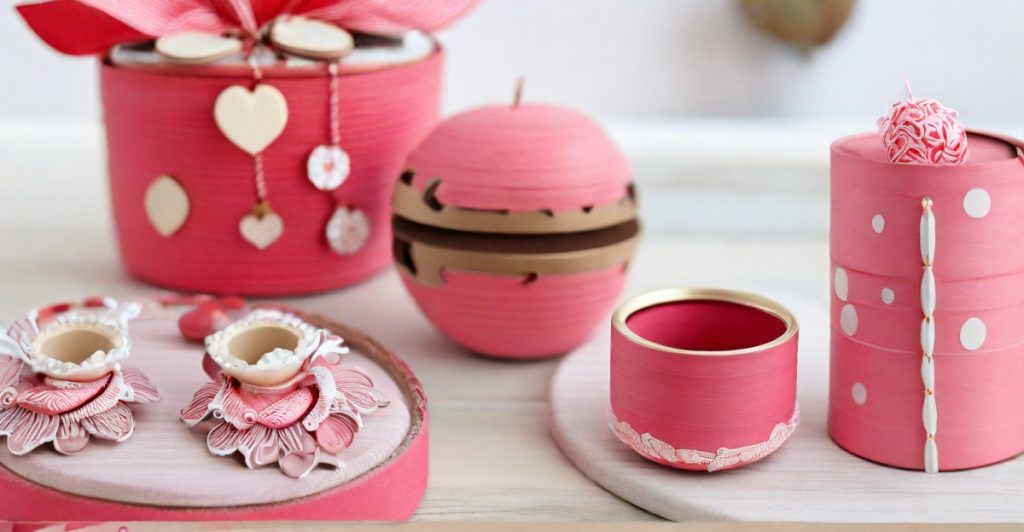
7. Personalized Candles
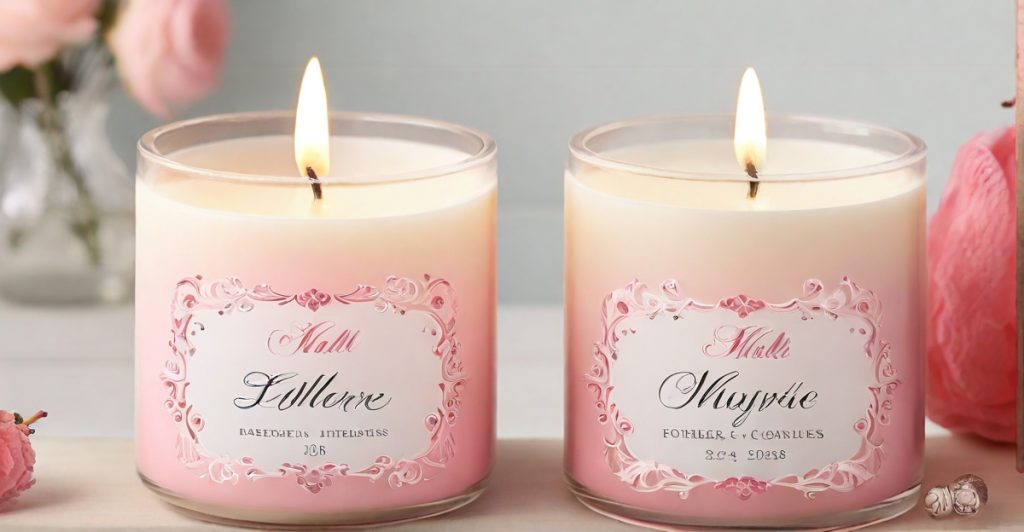
Personalized candles offer a unique and stylish addition to your home decor. Here’s a step-by-step guide to making your own:
- Select Your Image: Choose a favorite photo or design that holds sentimental value.
- Prepare Your Image: Print the chosen image onto tracing paper or regular paper.
- Apply the Image to the Candle: Use techniques like packing tape transfer or decorative tissue paper to transfer the image onto the candle surface[2][4].
- Printed Photo Candle: Consider creating a printed photo candle by printing the image directly onto the candle surface[6].
- Finishing Touches: Add decorative elements, such as ribbons or additional embellishments, to enhance the elegance of your personalized candle.
- Budget-Friendly Options: If you’re on a budget, explore cost-effective methods like packing tape and a printed photo for a personalized touch without breaking the bank[6].
Personalized candles not only serve as a charming decor item but also make for thoughtful gifts, bringing a personal touch to any space.
8. Hand-painted Pottery
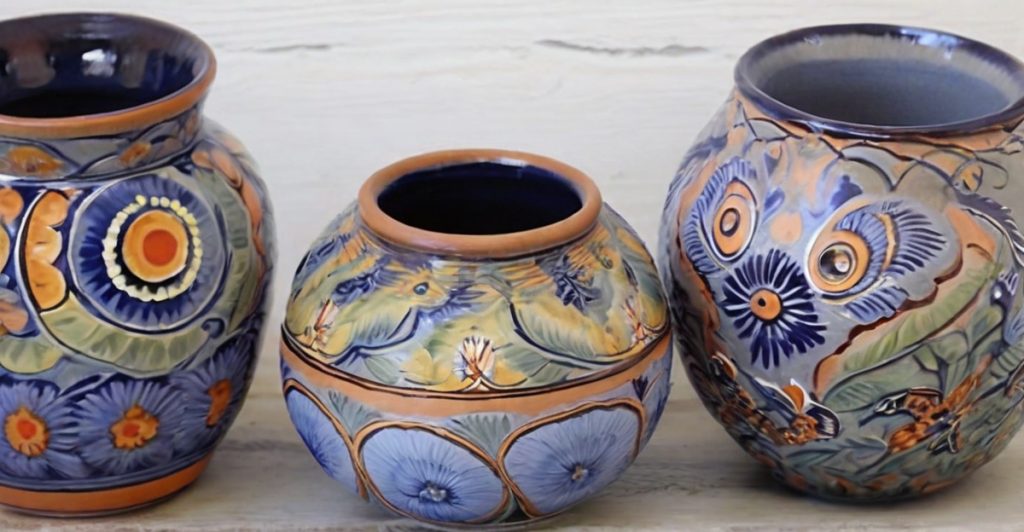
Hand-painted pottery is a versatile and enjoyable craft suitable for individuals of all skill levels.
Whether you’re a beginner or an experienced artist, here’s why you should delve into the world of hand-painted pottery:
- Creativity Unleashed: Pottery painting allows you to unleash your creativity on a three-dimensional canvas. From functional items like mugs and plates to decorative pieces, the possibilities are endless[3].
- Therapeutic Benefits: Engaging in pottery is often described as therapeutic and relaxing. The tactile nature of working with clay, coupled with the rhythmic motion of hand-painting, provides a calming experience[4].
- Accessible for All Ages: Hand-painted pottery is an inclusive activity suitable for people of all ages. Numerous studios offer hands-on experiences, making it a great family or group activity[3][6].
- Health Benefits: Beyond the creative aspects, pottery has health benefits. The synergy between your mind and body while working with clay enhances focus and concentration[5].
- Personalized Artifacts: Crafting hand-painted pottery allows you to create personalized artifacts, making it an excellent choice for unique gifts or personal home decor[3].
Whether you’re seeking a solo creative outlet or a social group activity, hand-painted pottery offers a fulfilling and rewarding experience for everyone.
9. Homemade Bath Bombs
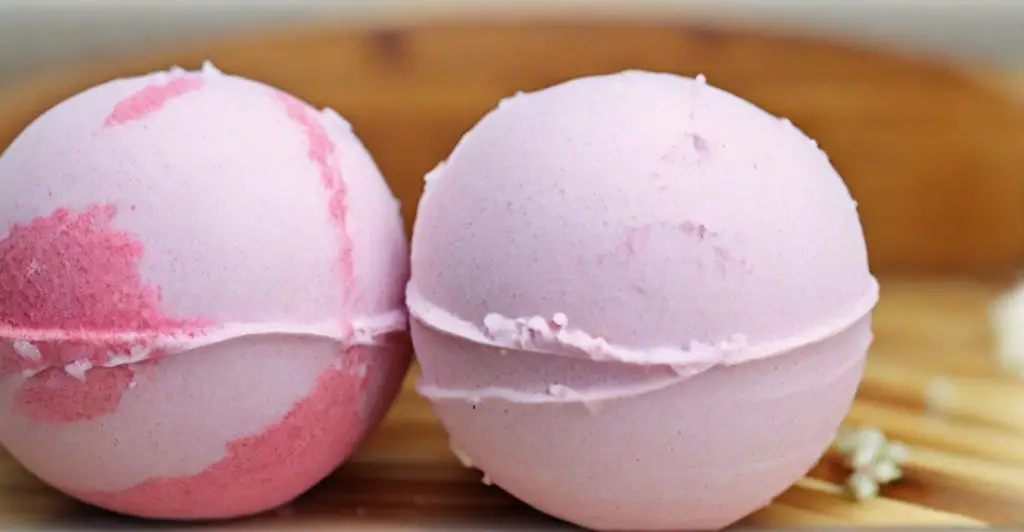
Creating your bath bombs is a delightful and customizable craft that not only adds a personal touch to self-care but also makes for wonderful gifts. Here’s a simple guide to making homemade bath bombs:
- Gather Ingredients: Collect ingredients like baking soda, citric acid, Epsom salt, cornstarch, essential oils, and coloring. These components are the foundation of a fizzing and aromatic bath bomb[1][6].
- Mix Dry Ingredients: Combine baking soda, citric acid, Epsom salt, and cornstarch in a bowl. This forms the dry base of your bath bomb.
- Add Fragrance and Color: Incorporate your preferred essential oils for fragrance and food coloring for color vibrancy. Mix well to ensure even distribution.
- Spritz with Liquid Mixture: Gradually spritz a mixture of water and additional fragrance onto the dry ingredients. Ensure the mixture holds together when squeezed but isn’t overly wet.
- Mold the Bath Bombs: Pack the mixture into molds of your choice. You can use traditional spherical molds or get creative with various shapes.
- Let Them Set: Allow the bath bombs to dry and harden in the molds for at least 24 hours.
- Personalize for Gifting: Once dry, consider decorating or packaging them creatively for a personalized gift. Bath bombs make thoughtful presents for friends, and family, or as party favors[2][5].
- Indulge in a Relaxing Bath: Of course, don’t forget to save a few for yourself! Drop a homemade bath bomb into your bath for a fizzy, fragrant, and indulgent experience.
Crafting homemade bath bombs is not only a fun and creative endeavor but also a delightful way to enhance your bath time and share the joy with others.
10. Custom-designed Tote Bags
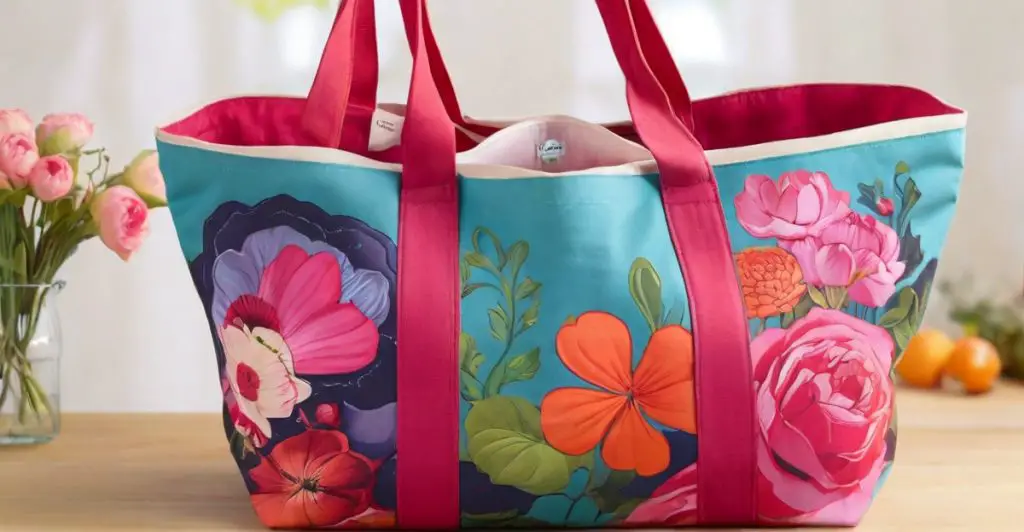
Custom-designed tote bags offer a fantastic opportunity to showcase your creativity and make a bold fashion statement. Here’s a step-by-step guide on how to embark on this exciting project:
- Choose Your Design: Start by selecting a design that resonates with your style. This could be a graphic, text, or a combination of both.
- Explore Printing Techniques:
- Heat Transfer Printing: Utilize heat transfer techniques for a professional and durable finish. This involves transferring a design onto the tote bag using heat, often achieved with an iron or a heat press machine[1][3].
- Paint & Vinyl Tutorial: Alternatively, unleash your artistic side by hand-painting the tote bag. Combine paint and vinyl for a unique and personalized touch[5].
- Stencil Method: For a DIY approach, create stencils using sticky back foam sheets. Draw your desired design on the foam, cut it out, and use it as a stencil to paint your tote bag[6].
- Cricut Machine: If you have a Cricut machine, learn how to make custom tote bags with precision-cut vinyl designs. This method allows for intricate and detailed patterns[4].
- Personalize for Gifts or Events: Once your tote bag is customized to perfection, consider making extras as thoughtful gifts for friends or creating a matching set for special events.
Expressing your style through custom-designed tote bags is not only a rewarding creative outlet but also a sustainable and stylish way to carry your belongings.
11. Terrarium Crafting
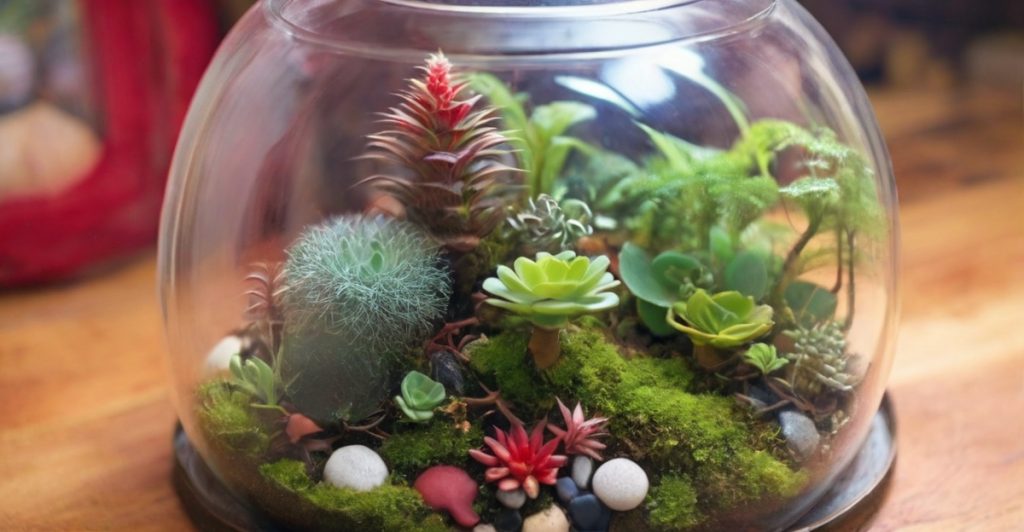
Terrarium crafting is a delightful way for plant enthusiasts to bring a piece of nature indoors. Here’s a step-by-step guide to creating your own stunning and low-maintenance terrarium:
- Choose Your Container: Select a clear glass or plastic container with a lid or open top. The choice of container depends on your aesthetic preference and the type of terrarium you want to create.
- Layer the Base:
- Begin with a layer of small stones or pebbles at the bottom for drainage.
- Add a thin layer of activated charcoal to prevent bacterial growth and keep the terrarium fresh.
- Place a layer of potting mix suitable for the plants you’ve chosen.
- Select Plants Wisely: Opt for small, slow-growing plants that thrive in humid environments. Succulents, air plants, and moss are popular choices for terrariums.
- Arrange and Plant: Experiment with different arrangements before planting. Create height variations by planting taller plants towards the back and shorter ones in the front. Use a small trowel or spoon for planting.
- Decorate (Optional): Add decorative elements like small figurines, stones, or miniature accessories to enhance the visual appeal.
- Maintain the Terrarium: Place your terrarium in indirect light and water sparingly, as the enclosed environment retains moisture. Keep an eye on the condensation – too much may indicate overwatering.
Terrarium crafting provides a captivating way to showcase your plant love while requiring minimal upkeep. Enjoy the beauty of a miniature garden in the comfort of your home.
12. Homemade Soap
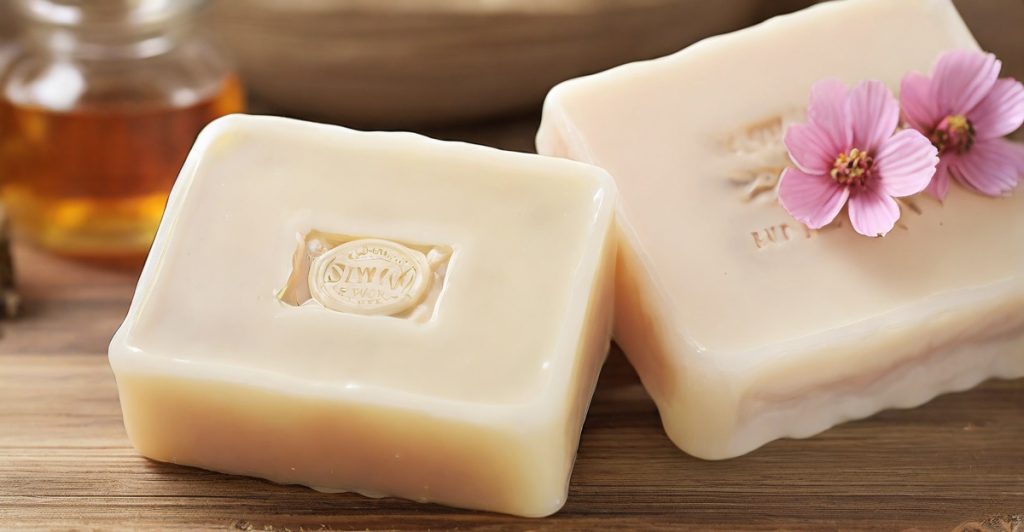
Crafting your homemade soaps is not only a pleasurable and creative activity but also a wonderful way to indulge in self-care and share thoughtful gifts with your loved ones.
Here’s a simplified guide to get you started:
- Gather Ingredients and Tools:
- Choose a soap base, such as glycerin or goat milk soap base.
- Select fragrances like essential oils for a personalized touch.
- Get molds, mixing bowls, and stirring utensils.
- Melt the Soap Base:
- Cut the soap base into small chunks for even melting.
- Melt the chunks in a microwave or a double boiler until smooth.
- Add Fragrance and Color:
- Mix in your chosen fragrance and colorants, ensuring an even distribution.
- Pour into Molds:
- Pour the melted soap into molds of various shapes and sizes.
- Customize with Additives (Optional):
- Enhance your soap with additives like exfoliants (oats, coffee grounds) or decorative elements (dried flowers).
- Allow to Set:
- Let the soap cool and harden in the molds for several hours or overnight.
- Unmold and Package:
- Once set, gently remove the soap from the molds.
- Consider creative packaging for a personalized touch.
- Enjoy or Gift:
- Use the homemade soaps for your daily skincare routine.
- Share them as heartfelt gifts for special occasions.
Crafting homemade soaps not only brings joy but also allows you to tailor each creation to your preferences, resulting in a truly unique and personalized pampering experience.
13. Wall Art
Embark on an artistic journey as we explore a modern approach to wall art, infusing your living space with unique and personalized charm. Here’s a guide to help you create captivating pieces:
- DIY Abstract Art:
- Use a canvas as your blank slate.
- Experiment with bold brushstrokes, blending colors for an abstract masterpiece.
- Wooden Geometric Sculptures:
- Craft wooden pieces into geometric shapes.
- Arrange and mount them on a backing for a visually striking 3D effect.
- Lace Art:
- Stretch lace fabric over a canvas or frame.
- Spray-paint over the lace for an elegant and intricate pattern.
- Stone Art Wall Hanging:
- Create a unique wall hanging with stone art using wall putty.
- Arrange stones to form patterns or images, adding texture to your decor.
- Two-Tone Stamp Art:
- Carve a simple stamp design into a potato or rubber block.
- Stamp onto a canvas with contrasting colors for a stylish effect.
- Pixelized Wall Art:
- Pixelate a favorite image using small, colorful squares or tiles.
- Recreate the pixelated image on a larger scale for a contemporary look.
These DIY wall art projects offer a departure from conventional decor, allowing you to express your creativity and infuse your home with a personal touch.
14. DIY Crafts with Fabric
Unleash the colors and patterns hidden in fabric scraps or old tees! Fabric crafts invite a world of texture and design possibilities, turning the ordinary into chic, handmade treasures.
Whether you’re upcycling garments or giving your storage bins a makeover, these projects are all about threading fun and flair into your crafting journey.
Tie Dye Headbands from T-Shirts
Turn old t-shirts into vibrant tie-dye headbands with some fabric dye and creativity. Each piece becomes a unique, wearable work of art. You can pick from your favorite shirt colors to start crafting something special.
It’s simple—twist or fold the fabric, add bold or pastel dyes, and set it aside to dry.
Wear these colorful headbands for a pop of fun in your outfit, or gift them to friends as one-of-a-kind treasures. Crafting these headbands is not just about style; it’s also about intelligent recycling.
Dive into making tie-dye wonders today and watch how a plain t-shirt transforms into an eye-catching accessory!
Fabric Covered Organizer Bins
Transform your cluttered spaces with fabric-covered organizer bins that are both stylish and functional. Dollar Tree bins can become trendy storage solutions with just a bit of Mod Podge and your favorite fabric scraps.
Whether you have bits of an old t-shirt or patterned cloth, cover these inexpensive bins to match the vibe of any room.
This DIY project lets you unleash your creative side as you mix patterns, play with colors, and explore textures.
Please make use of those leftover fabrics by wrapping them around ordinary storage bins for an instant upgrade.
Not only will these custom containers keep your items neatly tucked away, but they’ll also serve as unique home decor pieces that reflect your style.
The step-by-step tutorial guides you through each stage, ensuring a smooth crafting experience. Celebrate resourcefulness while creating practical beauty for everyday living—it’s DIY at its finest!
15. DIY T-Shirt Stamp
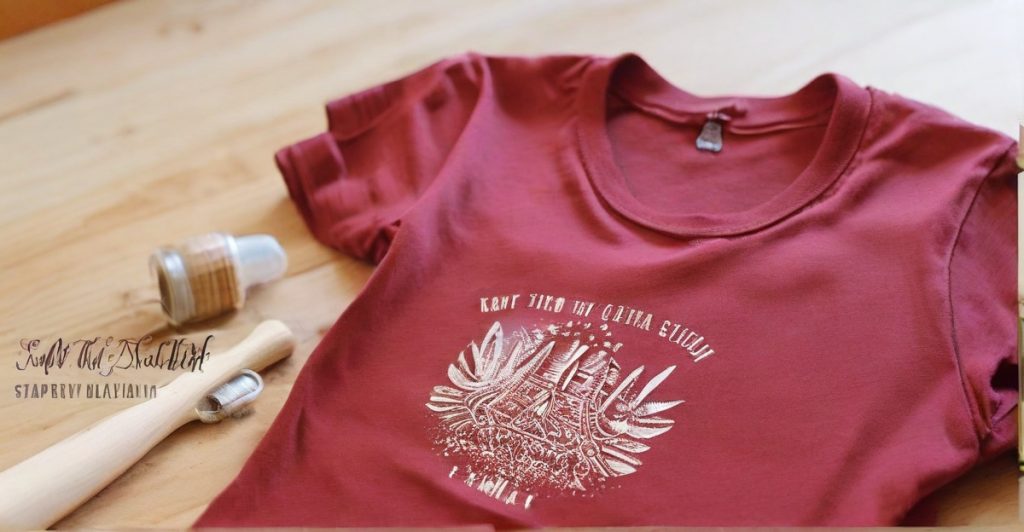
Create your custom T-shirt designs with this easy step-by-step guide for making a DIY T-shirt stamp from a takeout box:
Gather Materials:
- Obtain a clean takeout box with a flat surface.
- Choose a design for your stamp, keeping it simple for the best results.
- Get a craft knife, cutting mat, and fabric-friendly paint.
Prepare the Takeout Box:
- Cut out one side of the takeout box to create a flat stamping surface.
- Trim the edges and ensure the surface is smooth.
Create Your Design:
- Draw or trace your chosen design onto the flat surface of the takeout box.
- Use the craft knife to cut out the design, creating a stamp carefully.
Apply Fabric Paint:
- Pour fabric paint onto a flat surface like a plate.
- Dip the stamp into the paint, ensuring even coverage.
Stamp the T-Shirt:
- Position the T-shirt on a flat surface.
- Press the stamp onto the T-shirt firmly and evenly.
Set the Design:
- Follow the fabric paint instructions for setting the design.
- This may involve air drying, heat-setting, or ironing.
Enjoy Your Custom T-Shirt:
- Once the paint is specified, your DIY-stamped T-shirt is ready to wear.
Experiment with different designs, colors, and stamping techniques to create unique and personalized T-shirts.
16. DIY Crafts with Mason Jars
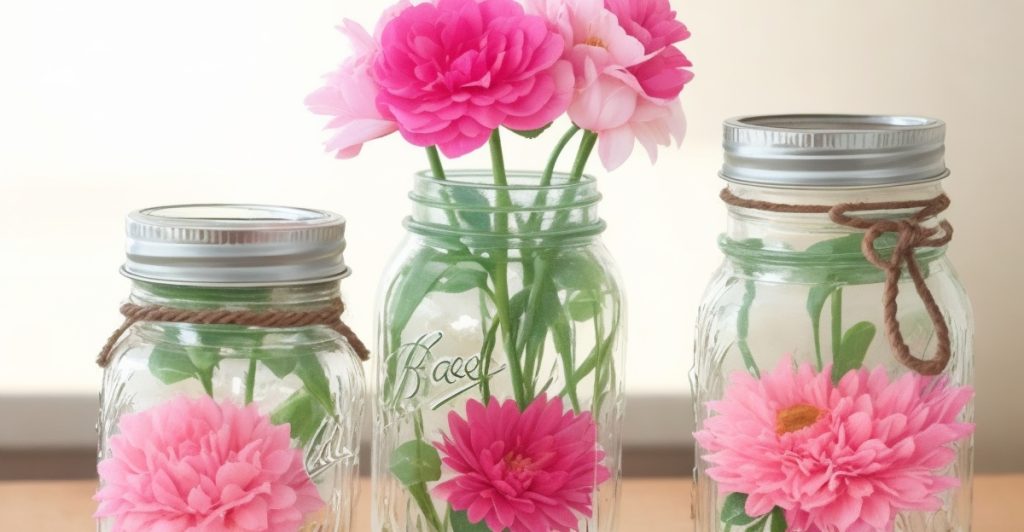
Unlock the charm of Mason jars with some creative zest! These iconic glass containers aren’t just for canning—they’re a blank canvas for your imagination.
From adding a touch of elegance with lace to imbuing them with color, Mason jar crafts infuse personality into every corner of your space.
Get ready to transform the ordinary into extraordinary and have fun while you’re at it—Mason jars are waiting for your magic touch.
- Lace Mason Jars
Turn plain glass jars into elegant lace mason jars for a touch of class. This project is simple and cost-effective, yet the results are stunning. You’ll need some lace, glue, and your choice of jar.
Stick the lace around the jar carefully to create a black-and-white theme that’s perfect for home decor or as a heartfelt gift.
Get creative with this DIY craft idea! Once you finish decorating your jars, fill them with lights or flowers to brighten up any room. Next up: let’s add color to those shelves with “Colored Mason Jars.”
- Colored Mason Jars
Colored Mason jars bring a burst of color to any room. Use them for storing small items or as part of a centerpiece.
Grab some paint and brushes, then let your creativity flow. You can design patterns or coat the jars in vibrant hues.
These jars are more than just pretty; they’re practical, too. Get ready to light up your space with DIY lanterns made from colored Mason jars.
They’re perfect for an evening party or quiet dinner at home. Just add a tea light inside—a simple touch that makes all the difference.
With these decorated jars, you’ll give your living area or event that special glow everyone loves.
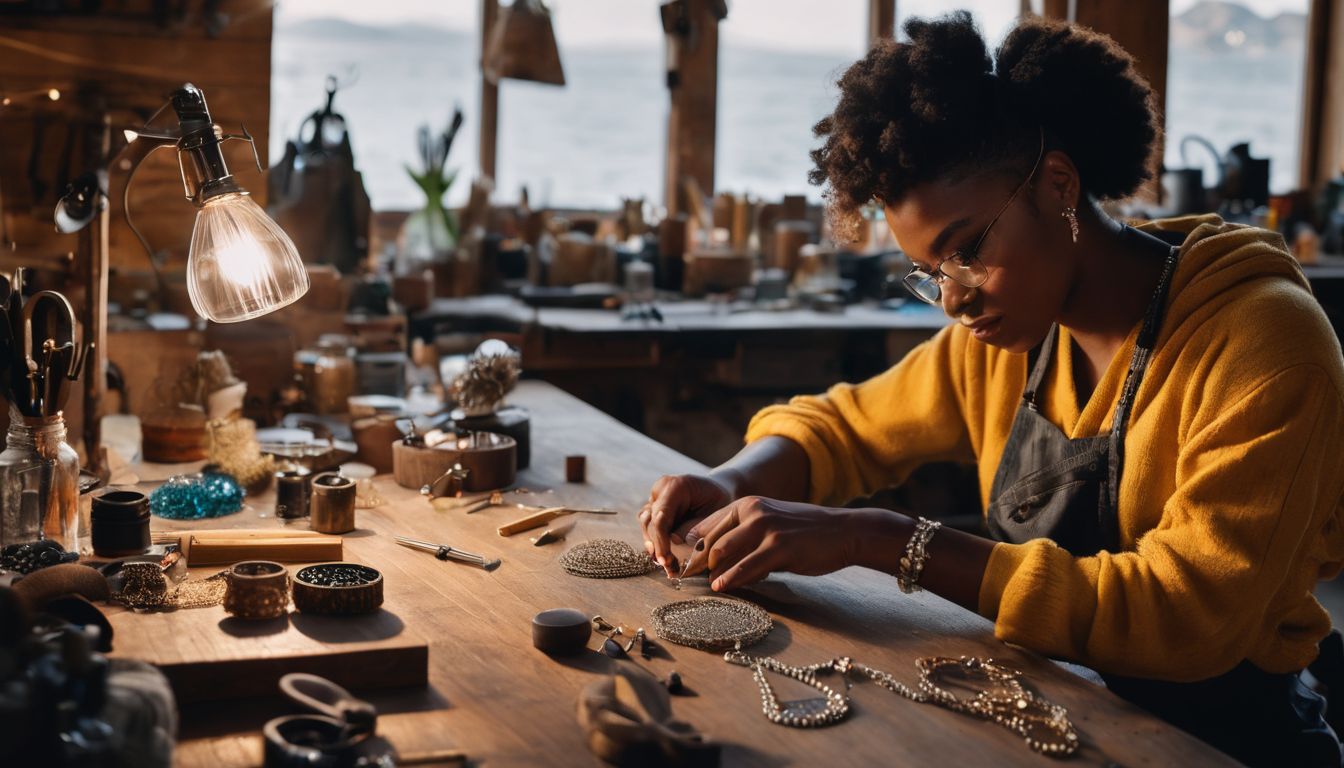
17. DIY Crafts for Personal Accessories
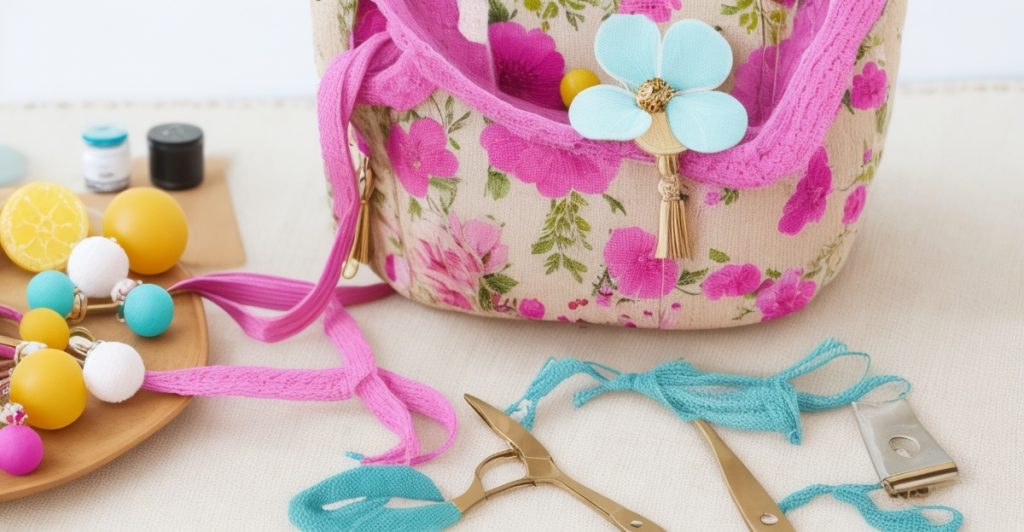
DIY Crafts for Personal Accessories:
Transform everyday items into stylish personal accessories with a touch of creativity; it’s time to get your hands busy crafting unique pieces that reflect your personality and style.
Whether you’re looking to add flair to your wardrobe or create handmade gifts, these DIY crafts will have you stepping out in a bespoke fashion that’s all your own.
18. DIY Flower Headband
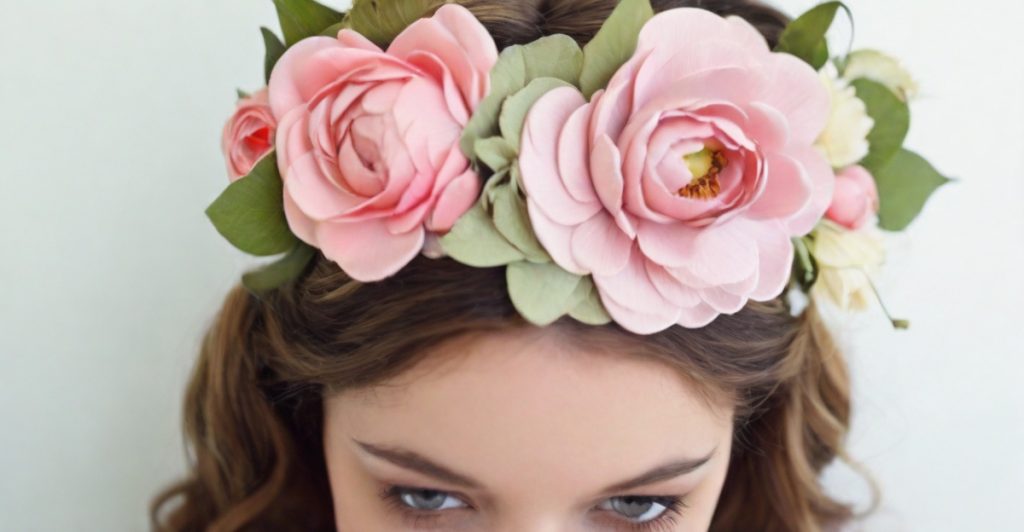
Create a beautiful and adjustable flower headband with this easy step-by-step guide:
Gather Materials:
- Collect an assortment of fresh or faux flowers.
- Acquire a flexible wire or a pre-made headband as the base.
- Have scissors, floral tape, and wire cutters on hand.
Prepare Flowers:
- Trim the flower stems to around 1.5 inches in length.
- Remove excess leaves to create clean stems for attaching.
Measure and Cut Wire:
- Measure the wire or pre-made headband around your head.
- Cut the wire or headband, leaving extra length for adjustments.
Attach Flowers to the Wire:
- Starting at one end, secure the flower stems to the wire using floral tape.
- Overlap each flower slightly and continue wrapping.
Adjust as Needed:
- After attaching all the flowers, try on the headband and make any necessary adjustments.
- Ensure it fits comfortably and sits well on your head.
Secure the Ends:
- Wrap the ends of the wire with floral tape for a finished look.
- If using a pre-made headband, secure any loose ends.
Finishing Touches:
- Optionally, add ribbons, beads, or additional embellishments for extra flair.
- Ensure all flowers are securely attached before wearing them.
Enjoy Your Flower Headband:
- Your DIY flower headband is now ready to wear for various occasions, from festivals to weddings.
This adjustable flower headband offers a personalized touch to your style and allows you to express your creativity.
19. Monogrammed Keychains
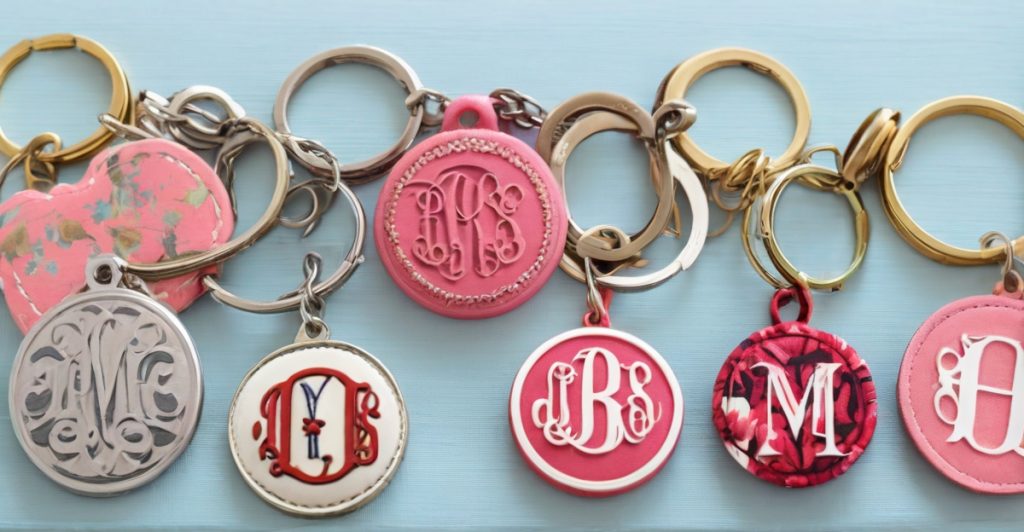
Create personalized monogrammed keychains with this simple step-by-step guide:
Gather Materials:
- Acquire polymer clay in your chosen colors.
- Obtain keychain hardware, such as jump rings and key rings.
- Have craft tools, including a rolling pin and cutting tools.
Prepare Clay:
- Soften the clay by kneading it in your hands.
- Roll out the clay into a flat, even sheet using a rolling pin.
Cut Out Monogram Shapes:
- Use cookie cutters or freehand cutting to create the desired monogram shape.
- Ensure the thickness of the clay is consistent for uniformity.
Add Personalization:
- Use smaller tools to carve or imprint the monogram onto the clay.
- Experiment with different textures or patterns to enhance the design.
Make a Hole for Keychain Hardware:
- Use a straw or a small clay-cutting tool to create a hole near the top of the monogram for attaching the keychain hardware.
Bake According to Instructions:
- Follow the recommended baking instructions for the specific polymer clay you’re using.
- Allow the monogrammed keychains to cool completely after baking.
Attach Keychain Hardware:
- Insert a jump ring through the hole in the monogram.
- Attach the jump ring to a key ring to complete the keychain.
Optional: Seal for Protection:
- Consider applying a clear sealant or glaze to protect the keychain and add a glossy finish.
Enjoy Your DIY Monogrammed Keychain:
- Your personalized keychain is ready to use or gift to someone special.
Get creative with colors, shapes, and monogram styles to make unique keychains that reflect your taste.
20. DIY Washer Necklaces
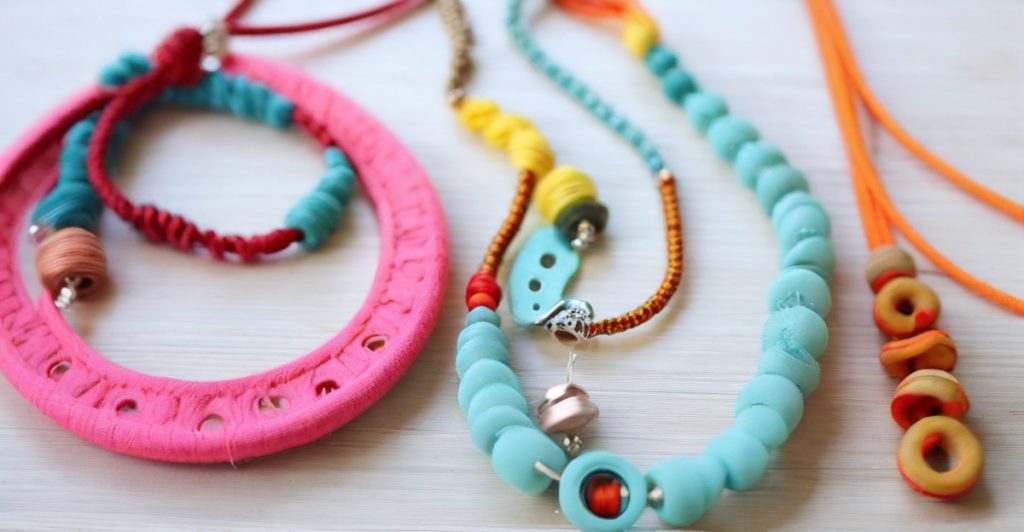
Create stylish washer necklaces with this easy step-by-step guide:
Gather Materials:
- Collect washers in various sizes.
- Choose acrylic paint or nail polish for coloring.
- Get jewelry cords or chains.
- Have jump rings, clasps, and pliers for assembly.
Clean and Prep Washers:
- Ensure washers are clean and free of any residue.
- If desired, sand the surface for better paint adhesion.
Paint or Color Washers:
- Apply acrylic paint or nail polish to the washers.
- Experiment with colors and patterns for a personalized touch.
Add Dimension (Optional):
- Consider using Dimensional Magic for a glossy, raised effect.
- Allow the dimensional magic to dry completely.
Create a Center Hole:
- Use a drill or a metal hole punch to create a hole in the center of each washer.
String the Washers:
- Thread the washers onto the jewelry cord or chain.
- Arrange them in a visually pleasing order.
Attach Clasps:
- Use jump rings and pliers to attach a clasp to each end of the necklace.
Adjust Length (Optional):
- Customize the length by adding or removing washers.
- Ensure a comfortable fit around the neck.
Secure and Finish:
- Ensure all connections are secure.
- Optionally, apply a clear sealant for added durability.
Enjoy Your DIY Washer Necklace:
- Your unique and handmade washer necklace is ready to wear or gift.
Experiment with different washer sizes, colors, and embellishments to create a variety of stunning necklaces.
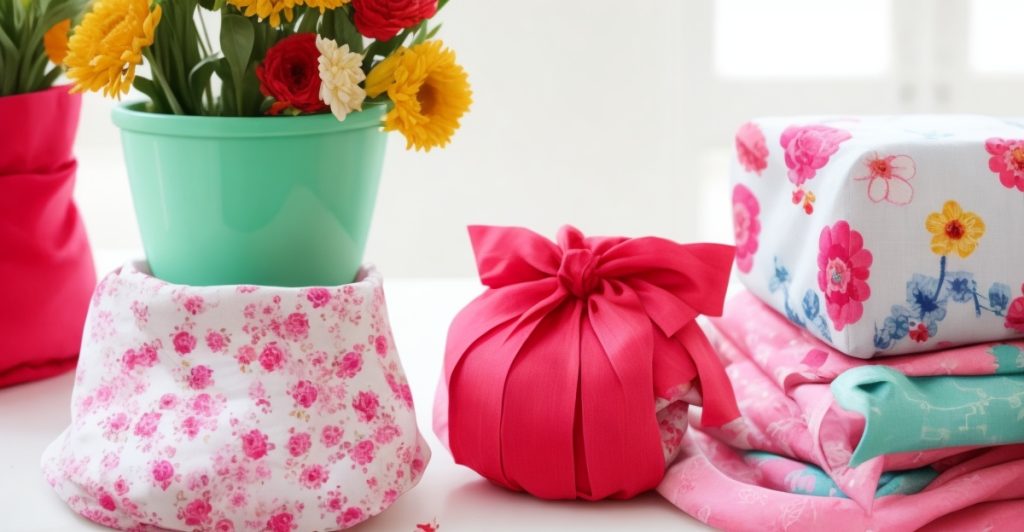
21. DIY Craft Ideas for Gifts
Creating gifts by hand adds a personal touch that can’t be found in store-bought items. Crafting for gifts is not only a creative endeavor but also a way to show care and thoughtfulness.
- Personalized Photo Calendar: Use family photos to make a custom calendar. Get creative with themes for each month.
- Hand-painted Mugs: Buy plain mugs and paint them with unique designs or messages.
- Homemade Candles: Mix wax, wicks, and scents to create candles that match the recipient’s favorite fragrances.
- Knitted Scarf or Hat: If you know how to knit, create warm accessories in the gift receiver’s preferred color.
- Customized Jewelry Box: Decorate a plain box with paint, beads, or decoupage techniques.
- Bath Bomb Set: Combine baking soda, citric acid, and essential oils for a relaxing bath experience.
- Leather Bookmarks: Cut leather strips and stamp them with initials or favorite quotes.
- Painted Plant Pots: Grab terracotta pots and acrylic paints to design a unique home for plants.
- Recipe-in-a-Jar: Layer dry ingredients for cookies or soup in jars and attach the recipe card.
- Embroidered Hand Towels: Stitch initials or simple designs onto towels for a classy touch.
- Beaded Bracelets: String together beads in customized patterns or colors that suit the friend’s taste.
- Wooden Coasters: Sand down wood slices and varnish them for rustic drink coasters.
Concluding Thoughts on DIY Craft Ideas for Adults
Dive into DIY crafts and transform your home with personal touches. From upcycling old items to crafting new decor, endless possibilities await you.
Whether making gifts or sprucing up your space, these projects add fun and creativity to your days.
Grab some supplies and let your imagination soar! Remember, each creation tells a unique story—yours.
For even more inspiration, check out our list of DIY craft ideas perfect for gifts!
FAQs About DIY Craft Ideas for Adults
1. What are some DIY craft ideas for adults?
There’s a whole world of DIY crafts waiting out there – think of seasonal decorations or unique home accessories you can create right from the comfort of your own space. You’ve got options ranging from colorful paintings to handmade candles and even personalized jewelry.
2. Can I make seasonal crafts at home?
You can! Seasonal crafts add that special touch to your home throughout the year. Try making wreaths in the fall, festive ornaments during winter, cheerful garden signs in spring, or bright sun-catchers for those sunny summer days.
3. Is it expensive to get started with DIY crafting?
Here’s the excellent news – not necessarily! Projects can be done using items you already have around your house. Plus, repurposing old materials not only saves money but also gives a unique twist to your creations.
4. Where do I find inspiration for my craft projects?
Inspiration is everywhere – from magazines and Pinterest boards to nature walks and local craft stores’ displays. Keep an eye out; sometimes, even everyday objects spark the best ideas for that next fantastic project.
References:
- pinterest.com – 110 Best personalized candles ideas
- itsalwaysautumn.com – How to Make Personalized Photo Candles
- jennifermaker.com – DIY Personalized Candles with Your Own Photos!
- instructables.com – Personalized Candle : 8 Steps
- happilyeverafteretc.com – DIY Personalized Photo Candles (on a budget!)
- mountbonnell.com – Unleash Your Creativity at Austin Pottery Painting Studio | Fun for All
- claygroundonline.com – Top 10 Health Benefits of Pottery
- feelartistic.org – Pottery Making: Essential Techniques, Styles, and Benefits
- claywire.com – after school art enrichment Archives
- mountbonnell.com – Unleash Your Creativity at Austin Pottery Painting Studio | Fun for All
- claygroundonline.com – Top 10 Health Benefits of Pottery
- feelartistic.org – Pottery Making: Essential Techniques, Styles, and Benefits
- claywire.com – after school art enrichment Archives
- youtube.com – DIY Custom Tote Bag: Heat Transfer Printing Tutorial
- youtube.com – How to Create a Custom Tote Bag (Printify – Print on Demand)
- youtube.com – How To Make A Personalised Tote Bag: Paint & Vinyl Tutorial
- youtube.com – How To Make Custom Tote Bags with Cricut
- shopwith-trea.com – 5 Ways To Custom DIY Tote Bag At Home
- tropicalglass.co.uk – Low-care plants for a closed terrarium
- phsonline.org – How to Make a Terrarium: A Step-By-Step Guide
- planetnatural.com – 35 Best Terrarium Plants for a Lovely Indoor Garden
- kew.org – Make your own terrarium
- amazon.com – Emile Joy Soap Making For Beginners
- lush.gr – The Joy of Soap: A Gourmet Guide to Soapmaking
- simplegoodnesssoaps.com – Joy Goat Milk Soap
- lanecountybounty.com – Organic, Cold Process Soap | Joy
- bhg.com – 15 DIY Wall Art Projects for a High-End Look
- countryliving.com – 34 DIY Wall Art Ideas to Add Personality to Your Home
- pinterest.com – Stone art wall hanging with wall putty
- BLACK+DECKER – DIY wine cork board
- Instructables – DIY Wine Cork Board: Recycle and Upcycle
- Girl Just DIY – Wine Cork Board – an Easy DIY Project to get Organized
- Crafts for All Seasons – Wine Cork Board
- Green With Decor – The secret to making a DIY cork bulletin board
- Hearth and Vine – DIY Cork Board with Recycled Wine Corks
- DIY Candy – DIY Coasters Are Great Crafts for Beginners
- Instructables – How to Make DIY Coasters
- Mod Podge Rocks Blog – DIY Coasters: 50 Designs for Decor or Gifts!
- That Homebird Life – How to Make Craft Resin Coasters (a Step by Step Tutorial)
- Homemade Gifts Made Easy – How to Make Tile Coasters
- House of Hipsters – DIY Marbled Mugs – A Mug Dipped In Nail Polish
- The Sweetest Occasion – DIY Marble Dipped Mugs
- DIY Candy – DIY Marbled Mugs with Nail Polish (with Video!)
- Surviving a Teacher’s Salary – DIY Marble Mugs Tutorial – Handmade Gift
- Instructables – DIY Marble Mug : 9 Steps (with Pictures)
- Cassie Scroggins – DIY Marbled Mugs 2 Ways
- WikiHow – How to Make a Bulletin Board: 12 Steps (with Pictures)
- NoBroker – DIY Memo/ Bulletin boards 2024: Step by Step Guide
- The Spruce Crafts – 15 Bulletin Board DIYs to Get Organized
- DIY Candy – DIY Bulletin Board For Your Wall in Ten Minutes
- Pinterest – DIY Ribbon Memo Board! Easy tutorial for any size bulletin
- YouTube – Easy Tissue Paper Flowers DIY | Welcome to Nana’s
- Craftsy Hacks – How to Make Paper Flowers (Step-by-step Tutorial)
- The Craft Patch Blog – How to Make Paper Flowers
- Instructables – DIY Paper Flowers (Folding Tricks)
- First Palette – Folding Paper Flowers (8 Petals) | Kids’ Crafts
- Country Living – 21 DIY Paper Flowers – How to Make
- Artsy Fartsy Life – How To Make A Magazine Collage Mixed Media
- Andi Garbarino – How to Make “Good” Collages with Paper Magazines
- Mod Podge Rocks Blog – Magazine Collage (Make with Any Design!)
- Instructables – How to Make a Paper Collage : 10 Steps (with Pictures)
- MasterClass – How to Make a Collage: 3 Ways to Use a Collage
- Artsy Fartsy Life – Magazine Collage Process Video and Step By Step
- Instructables – DIY With Flowers: Floral Headband
- DIY Candy – DIY Flower Headband in Two Easy Steps!
- ProFlowers – How to Make a Flower Crown in 4 Easy Steps
- Fifty Flowers – How To Make A Flower Crown In 6 Simple Steps
- Wikihow – How to Make a Flower Crown: 3 DIY Craft Projects
- Instructables – HOW TO MAKE YOUR OWN MONOGRAM KEYCHAINS #shorts
- Homey Oh My – DIY Monogram Clay Keychains
- The Handmade Home – diy monogrammed keychains
- Instructables – HOW TO MAKE YOUR OWN MONOGRAM KEYCHAINS #shorts
- Homey Oh My – DIY Monogram Clay Keychains
- The Handmade Home – diy monogrammed keychains
- ARTBAR – Washer Necklaces
- Creations by Kara – Easy Washer Necklace Tutorial
- Mod Podge Rocks – Easy Washer Necklaces with Dimensional Magic
- Small for Big – DIY Washer Necklaces
- Gluesticks Blog – Nail Polish Washer Necklaces (Video)
- Frugal Family Home – Kid’s Craft, Washer Necklace Tutorial


Leave a Reply