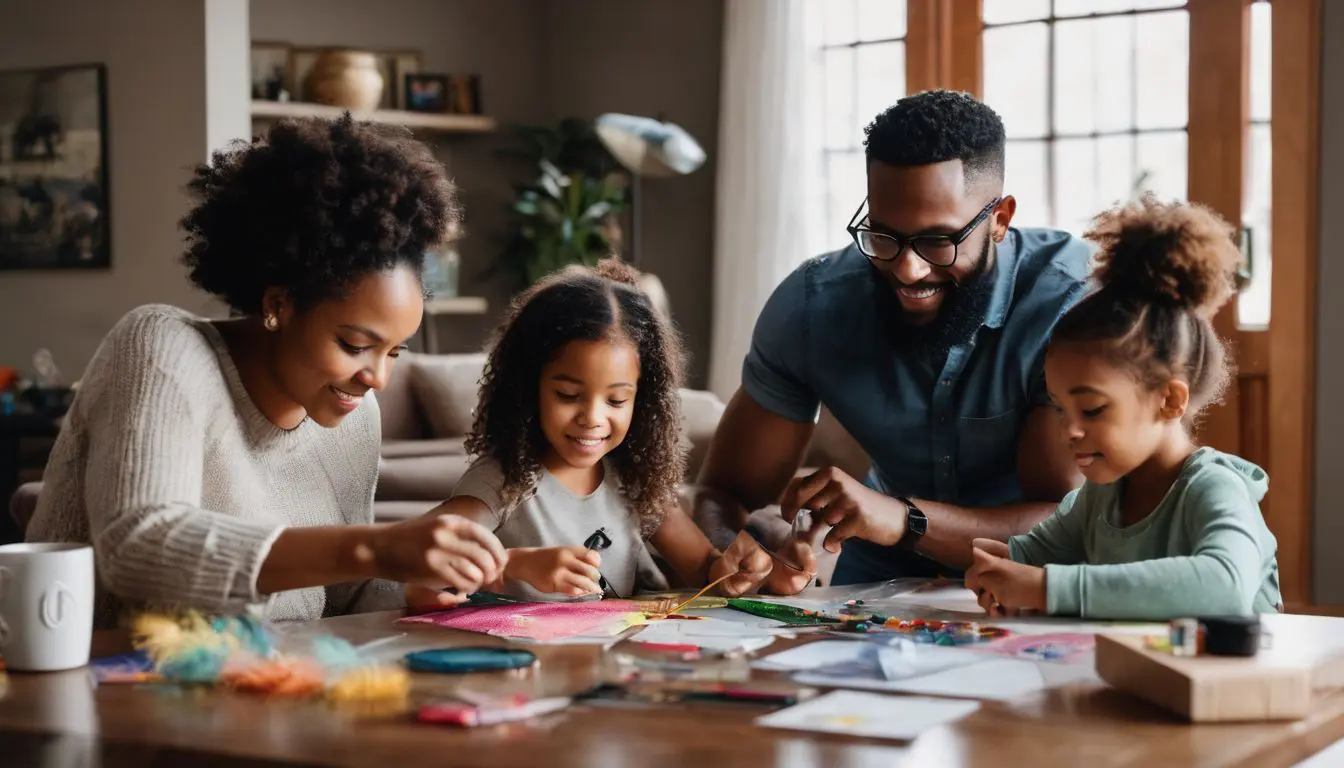
Finding that perfect gift for a special someone can often leave you scratching your head. Did you know most people cherish the time and effort put into homemade gifts? This article will guide you through crafting unique, heartfelt presents that are sure to impress while going easy on your wallet.
Let’s get crafty!
Key Takeaways
- You can make unique gifts like DIY tile coasters, Mod Podge soap, and family photo ornaments that show you care.
- Personal touches in crafts like chalk paint mason jars or DIY photo pendants add special meaning to your presents.
- Homemade items such as summer blooms garden aprons, beeswax wraps, and perpetual calendars are both thoughtful and useful.
- Crafting for gift-giving is not only budget-friendly but also allows you to personalize each item for your loved one’s tastes and preferences.
- With 50 different projects to choose from, there’s a handmade gift idea suitable for any occasion or recipient.
Handmade Gift Ideas

Dive into the world of crafting where personal touches mean everything; discover how to transform ordinary materials into heartfelt, handmade gifts. From charming DIY tile coasters to memory-keeping photo pendants, these creative ideas will show your loved ones just how much they’re cherished.
DIY Tile Coasters
DIY tile coasters are a hit for any celebration. They bring a unique, personal vibe to birthdays, holidays, and even baby showers. Here’s how to make your own:
- Start with some plain ceramic tiles from the hardware store.
- Choose your favorite scrapbook paper or fabric designs.
- Cut the paper or fabric to fit the tile’s top surface.
- Spread Mod Podge evenly on the top of each tile.
- Carefully place your cutout design onto the glue – covered tile.
- Smooth out any bubbles for a flat finish.
- Add another layer of Mod Podge over the design to seal it.
- Wait for it to dry completely—usually takes about an hour.
- Stick felt pads on the bottom corners to prevent scratching tables.
- Tie a ribbon around a set of coasters for an extra special touch.
Mod Podge Soap
Making Mod Podge soap is a fun DIY gift. You can create unique designs for friends and family.
- Gather your materials. You’ll need soap bars, Mod Podge, a brush, and decorative paper.
- Cut the paper to fit the soap bar size. Choose patterns or images that match the person you’re giving it to.
- Paint a thin layer of Mod Podge onto the soap surface. Make sure it’s smooth and even.
- Place your cut – out paper onto the wet Mod Podge layer. Press down gently to remove any air bubbles.
- Let it dry for a few minutes before applying another Mod Podge layer over the paper.
- Smooth out the top coat with your brush, sealing the edges of your design.
- Allow the soap to dry completely, which may take several hours or overnight.
Family Photo Ornaments add a personal touch to any celebration. They’re perfect for hanging on the tree or showcasing your favorite memories year-round.
- Choose photos that bring back happy memories. Pick from family vacations, birthdays, or silly moments.
- Gather your materials: clear glass ornaments, photo paper, ribbon, and scissors.
- Print out the chosen pictures. Make sure to scale them to fit inside the ornaments.
- Cut out the photos in circles or shapes that will easily slide into the glass bulbs.
- Gently roll up each photo and place it inside an ornament. Once inside, use a pencil eraser to help unfurl the picture.
- Add a pinch of glitter or fake snow for a festive look. This step is optional but adds sparkle!
- Close the ornament with its original cap. If it’s loose, use a dab of glue to secure it.
- Cut a length of ribbon for hanging. Tie it through the ornament cap securely.
- Write the year or a special message on the back of the photo with a permanent marker for an extra personal touch.
- Gift wrap your ornaments carefully. Use tissue paper and small boxes so they don’t break.
Chalk Paint Mason Jars
Moving from the warmth of family photo ornaments to the rustic charm of chalk paint mason jars, let’s explore this craft. Chalk paint mason jars come in all colors and are perfect for anyone’s taste. Here’s how to make them:
- Pick the right jar. Start with a clean, empty mason jar.
- Choose your color. Select the chalk paint shade that speaks to you.
- Paint away! Apply the first coat of chalk paint. Let it dry.
- Go for round two. Once dry, add a second coat if needed.
- Sand it down. For a distressed look, lightly sand edges when dry.
- Customize it. Use stencils or stickers to add names or designs.
- Seal the deal. Spray with a sealer to protect your work.
- Fill it up. Add flowers, candles, or candies inside as a finishing touch.
DIY Photo Pendant
After adding a rustic touch with Chalk Paint Mason Jars, switch gears to a more personal gift. A DIY Photo Pendant is perfect for keeping loved ones close to your heart. Here’s how to create this heartfelt accessory:
- Find a small photo of someone special. Make sure it fits the size of the pendant you have.
- Trim the photo carefully. Use scissors to cut it into the exact shape of the pendant base.
- Get a glass cabochon and some jewelry glue. You’ll need these to protect and seal the photo.
- Spread a thin layer of glue on the back of the glass cabochon. Be gentle so you don’t get air bubbles.
- Press the cabochon onto your photo firmly. This makes sure your picture sticks without wrinkling.
- Let it dry for a while. You want everything set before you move on to avoid smudges or slips.
- Apply glue to the inside of your pendant tray now. This is where your sealed photo will rest.
- Carefully place your photo and cabochon into the tray. Check that it’s centered just right.
- Again, give it time to dry thoroughly. Patience here means no last – minute mishaps!
- Add a chain once everything’s secure, and voilà! Your DIY Photo Pendant is ready to gift.
Creative DIY Projects

Unleash your creativity and surprise friends and family with handcrafted presents that are both purposeful and aesthetically delightful. From sprucing up the gardener’s attire to personalizing travel essentials, these DIY treasures offer a heartfelt touch to everyday items, turning them into memorable gifts.
Summer Blooms Garden Apron
Making the Summer Blooms Garden Apron is fun and simple. This project is perfect for crafters just starting out.
- Choose lightweight fabric with a floral print for the main apron piece.
- Cut the fabric to size, ensuring it wraps comfortably around the waist.
- Sew on pockets using complementary or matching fabric; they’re handy for tools and gloves.
- Attach long, sturdy ties at the waist so it fits most sizes.
- Hem all raw edges for durability and a clean finish.
- Decorate with appliqué flowers or garden – themed patches to add personality.
- Optional: Add a waterproof lining to keep clothes dry while watering plants.
- Press the apron with an iron for a crisp look before gifting.
Easy DIY Travel Mug
Give your loved ones a handmade travel mug. It’s perfect for coffee lovers who are always on the move.
- Choose a plain travel mug. You can find one at a craft store or online.
- Clean the surface. Wipe it with rubbing alcohol for paint to stick better.
- Pick your design. Decide what you want on the mug. Maybe it’s a quote, picture, or pattern.
- Use special markers or paints made for ceramics. These will stay on even after washing.
- Draw or stencil your design onto the mug. Take your time to make sure it looks great.
- Let the paint dry completely. This might take a couple of hours or overnight.
- Bake the mug if needed. Follow the instructions on your paint markers for setting the design.
- Add extras if you like. Wrap it with a ribbon or fill it with candy before giving.
Reusable Beeswax Wraps
- Start by choosing pure beeswax pellets or bars.
- Find 100% cotton fabric in patterns you like.
- Cut the fabric into sizes that fit your needs—small for leftovers, large for bread.
- Preheat your oven to a low setting, around 185°F (85°C).
- Place the fabric on a baking sheet and sprinkle evenly with beeswax.
- Melt the beeswax in the oven; it takes about 5 – 10 minutes.
- Spread the melted wax with a paintbrush to cover all areas.
- Hang the coated fabric to dry; it cools quickly.
- Use warm hands to mold the wrap over bowls or food items.
- Clean them with cool water and mild soap after each use.
- Store your beeswax wraps rolled up to avoid creases.
Photo Transfer Pillows
Switching from eco-friendly beeswax wraps to something more personal, photo transfer pillows make perfect gifts for loved ones. These cute and easy-to-make crafts capture special moments in a snuggly keepsake.
- Find a clear, high – resolution photo you love. This image will go on your pillow.
- Pick out a plain pillowcase or fabric piece that fits your pillow form. Light colors work best!
- Print the photo onto transfer paper made for fabric use. Make sure it’s the right size for your pillow!
- Carefully cut out the photo from the transfer paper, staying close to the edges of the image.
- Iron on the photo following the instructions on your transfer paper package. Take your time with this step.
- Let it cool down, then peel off the backing paper gently. Check that all edges are sealed well.
- Sew the fabric onto a pre – filled pillow or stuff it with a pillow insert if using a case.
- Add trimmings like pompoms or lace around the edges if you want some extra flair.
Fleece Ear Warmer Headband
Keep your ears toasty this winter with a fleece ear warmer headband. This easy, quick project makes a great gift for anyone who loves the outdoors.
- Cut fleece fabric into a long strip. Make it wide enough to cover both ears comfortably.
- Measure the head of the person you’re making it for. This ensures a perfect fit.
- Sew the short ends together. Use a sewing machine or hand stitch for durability.
- Flip it right side out. Now you’ll see the neat seam on the inside.
- Optional: add decorations! Think buttons, embroidery, or even appliqué designs for personality.
- Fold the headband at each end towards the center. This gives it a more rounded shape for wearing.
- Stitch these folds down. You can use matching or contrasting thread here.
- Test it out! Make sure it fits snugly but not too tight around the head.
DIY Craft Ideas That Could Potentially Sell
Turn your crafting hobby into a profit by making items that catch the eye. People love buying unique, handmade goods, especially if they can’t find them anywhere else. Start with custom jewelry boxes—they’re always in demand.
Use bold colors and quirky designs to stand out. Personalized tote bags are another hit; eco-friendly and stylish, they make perfect shopping or beach companions.
Candles made at home can also fetch a pretty penny. Experiment with scents like lavender or vanilla for a relaxing vibe that customers will adore. Don’t overlook digital artwork either—create printable planners or wall art that buyers can download right away.
With these crafts, you could earn money while doing what you love!
Unique Craft Ideas
Dive into the realm of originality with our unique craft ideas that promise to ignite a spark in your creative engine. From whimsical unicorn-inspired sugar scrubs to sleek, modern photo blocks, these projects are perfect for anyone looking to gift something truly one-of-a-kind.
Modern DIY Photo Blocks
Modern DIY Photo Blocks- Gather your favorite photos and trim them to fit the size of wooden blocks.
- Paint or stain the blocks in colors that match your style or the recipient’s decor.
- Spread a thin layer of Mod Podge on one side of the block.
- Carefully place a photo on top and smooth out any bubbles with your fingers or a brayer.
- Once dry, apply another coat of Mod Podge over the picture to seal it.
- Let it sit until completely dry, then repeat for each side you wish to decorate.
- If desired, add decorative touches like paint, stickers, or glitter around the edges.
- Consider writing dates or special messages on the back with a permanent marker for a personal touch.
- Tie them together with a ribbon or stack them in an attractive box for gifting.
- Share these custom photo blocks as thoughtful gifts that capture special moments.
Inexpensive Glass Photo Magnets
Making glass photo magnets is a fun and budget-friendly craft. They turn your favorite pictures into beautiful and practical keepsakes.
- Choose clear, flat glass gems found at any craft store.
- Pick out photos that are small or can be trimmed down to fit behind the gems.
- Use a strong glue like Mod Podge to attach the photo to the flat side of the gem.
- Apply another layer of glue over the back of the photo for extra hold.
- Cut out small magnet pieces from a magnetic sheet with scissors.
- Glue these magnets onto the dried photo and glass assembly.
- Let it all dry according to the glue’s instructions before using.
- Check for any rough edges or glue residue and clean them up for a polished look.
DIY Unicorn Sugar Scrub
Let’s make a DIY Unicorn Sugar Scrub. It’s a magical gift that will dazzle your friends and family.
- Gather your ingredients: white sugar, coconut oil, shea butter, essential oil like lavender or vanilla, mica powder for color, and jars with lids.
- Mix one cup of sugar with half a cup of melted coconut oil in a big bowl.
- Add two tablespoons of shea butter to the mix for an extra smooth feel.
- Drop in a few drops of essential oil for a sweet scent. Choose your favorite or mix them up!
- Divide the scrub into smaller bowls. Now it’s time to color it!
- Use mica powder to dye each bowl differently – think pink, purple, blue, and teal for that unicorn vibe.
- Layer the colors into your jars. Just like sand art!
- Seal the jars with their lids tightly once you’re all done layering.
- Decorate the outside with ribbons or stickers for a special touch.
DIY Perpetual Calendar
Crafting a DIY perpetual calendar is a heartfelt way to show you care. It brings personalization and uniqueness to any occasion, from birthdays to graduations.
- Gather materials: wood blocks, paint, stencils or stickers for numbers and months.
- Paint the wooden blocks in your chosen colors. Let them dry completely.
- Use stencils or stickers to add dates, months, and days of the week to each block.
- Arrange the blocks on a base piece of wood that serves as the calendar holder.
- Secure the daily and monthly blocks with adhesive if needed so they don’t slide off.
- Decorate the base and day/month blocks with designs or messages for added personal touch.
- Seal your painted surfaces with a clear coat for durability—this keeps colors bright over time.
- Assemble your calendar by placing the correct date and month at the front every day.
Painted Clay Ring Dish
Moving on from the perpetual calendar, another charming DIY gift idea is the painted clay ring dish. This project stands out for its simplicity and personal touch. Here’s how you can make one:
- Start by rolling out oven – bake clay to about 1/4 inch thickness using a rolling pin.
- Use a cookie cutter or a cup to cut a circle shape from the clay.
- Gently press the center of the circle with your thumb to create an indentation for rings to rest.
- For added character, pinch and slightly raise the edges to form a shallow bowl shape.
- Bake your clay dish in the oven according to the package instructions—usually around 15 minutes at 275°F.
- Once cooled, grab some acrylic paint for decoration. You can be as creative as you want with this part! Paint patterns, flowers, or even abstract art onto your dish.
- After painting, let it dry completely before moving on to sealing.
- Apply a layer of Mod Podge or clear sealant over your painting. This helps protect your design and gives it a glossy finish.
- Let the sealant dry entirely, which might take several hours.
- Place parchment paper on your working surface before starting to prevent sticking and make cleanup easier.
- If you like textures, use stamps or lace to imprint designs into the clay before baking.
- Don’t rush drying times between painting and sealing; patience ensures better results.
Personalized Gift Ideas
6. Personalized Gift Ideas:.
Delve into the world of bespoke presents with personalized gift ideas — where each craft carries a piece of your heart, tailored to echo personal tales and forge lasting memories.
It’s about transforming simple materials into something uniquely meaningful for that special someone in your life; let’s explore these one-of-a-kind creations together.
Initial Wall Art on a Budget
Creating initial wall art is a great way to give a personalized touch to any room. It’s a thoughtful gift that shows you care without breaking the bank.
- Choose your base: Find an affordable canvas or wooden board at your local craft store.
- Pick your letter: Decide on the initial you want to showcase. Make it bold and meaningful.
- Select paints or markers: Buy colors that match the receiver’s home decor or favorite shades.
- Sketch your design: Lightly draw the initial onto your base. This will guide you as you decorate.
- Get creative with decoration: Use stencils, stamps, stickers, or freehand designs around the initial for extra flair.
- Add textures: Consider gluing on items like buttons, sequins, or fabric pieces for a 3D effect.
- Seal and protect: Once everything is dry, apply a clear coat of sealant to preserve the artwork.
- Wrap with love: Present your gift in handmade wrapping paper or within a reusable bag.
Lavender Vanilla Bath Bombs
Lavender Vanilla Bath Bombs make a special gift for any occasion. They bring luxury to anyone’s self-care routine.
- Start with mixing dry ingredients: baking soda, citric acid, and cornstarch.
- Add color: choose purple for a classic lavender look.
- Mix in the wet ingredients slowly: water, essential oils like lavender and vanilla, and oil for moisture.
- Choose molds: heart shapes add an extra touch of love.
- Pack the mixture tightly into each mold.
- Let them dry: find a spot where they won’t get wet or bumped.
- Wrap them up beautifully: tissue paper and ribbons do the trick!
- Include a personal note explaining how to use your bath bomb gift.
- Suggest they drop one in their bath to enjoy a fizzy, fragrant soak.
- Mention that these bath bombs are both indulgent and affordable to make.
Easy Wooden Spoon Painting
Painting wooden spoons is a fun craft. It turns an everyday item into a personalized gift.
- Grab some plain wooden spoons from the kitchen or store.
- Choose your favorite paint colors. Acrylic paint works well for this project.
- Lay down newspaper or a cloth to keep your workspace clean.
- Paint the handle of each spoon. You can make stripes, polka dots, or any design you like.
- Let the paint dry for at least an hour before touching it.
- After drying, apply a food – safe sealant to protect the paint when using the spoon.
- Tie ribbons around the spoons to add extra charm if you’re giving them as a gift.
- This project is great for kids and adults alike. Everyone can enjoy making unique patterns.
- Wooden spoon painting is not just for gifts. Use these spoons to brighten up your own kitchen too!
Infinity Scarf from a T-Shirt
Transforming an old t-shirt into a stylish infinity scarf is both creative and eco-friendly. This project turns something simple into a unique accessory.
- Choose a t-shirt: Pick a soft, stretchy t-shirt without side seams.
- Cut the shirt: Lay it flat and cut straight across, right under the arms.
- Make it seamless: Trim off the bottom hem to create one large loop of fabric.
- Stretch it out: Gently pull on the fabric to let the edges curl inwards and give it an infinity scarf shape.
- Personalize your design: Add patterns or designs with fabric paint if you like.
- Wear or gift: Enjoy wearing your new scarf or wrap it up as a thoughtful, homemade present.
DIY Mug Candle
After creating a cozy infinity scarf from an old T-shirt, let’s shift our focus to lighting up someone’s life. The DIY mug candle brings warmth and coziness into any home.
- Find a mug that matches the style of the person you’re gifting it to. Thrift stores are great places to find unique mugs.
- Wash the mug thoroughly. Make sure it is dry before starting your candle project.
- Purchase soy wax flakes for an eco-friendly option. These often burn cleaner than paraffin wax.
- Choose a wick that is appropriate for the size of your mug. Secure the wick in place at the bottom center of the mug using a bit of melted wax or a wick sticker.
- Melt the soy wax flakes in a saucepan over low heat. Keep an eye on it to prevent overheating.
- Add fragrance oil once the wax is melted. Pick scents like vanilla or lavender for a soothing effect.
- Carefully pour the melted wax into the mug. Keep it steady to avoid spills.
- Hold or secure the wick in place as the wax sets. Use pencils or chopsticks laid across the top of the mug to keep it centered.
- Allow your homemade candle to cool completely – this may take several hours.
- Trim the wick down to about half an inch once set and cooled.
Conclusion
Crafting something special for your loved ones shows how much you care. With these 50 DIY gift ideas, you have a treasure trove of inspiration. Pick a project, gather your materials, and let your creativity flow.
Whether it’s a birthday or just because, your handmade present will touch their heart. Remember – nothing beats the charm of a gift made with love!
If you’re feeling inspired by these crafts and are considering turning your hobby into a profit, check out our guide on DIY Craft Ideas That Could Potentially Sell for more information.
FAQs
Unfortunately, it appears that the keywords for Article 2 are not provided. Could you please provide the relevant keywords so I can create the FAQs appropriately?


Leave a Reply