DIY Craft Ideas
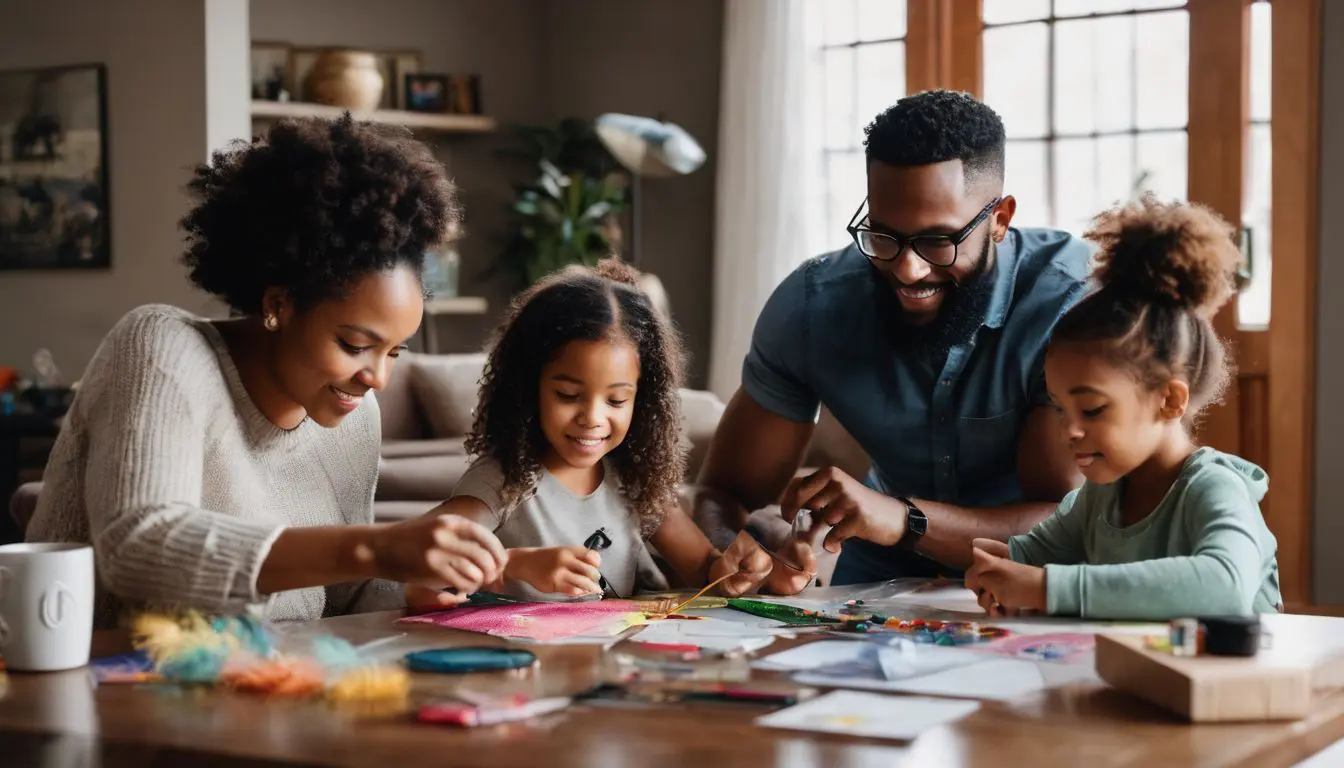
Feeling bored at home can be a real drag. Luckily, crafting offers a creative outlet that boosts happiness and confidence, backed by research.
Our list of 8 easy DIY crafts promises to transform idle hours into fun, productive ones with simple supplies you may already have.
Dive in and let’s get crafty!
Key Takeaways
- Crafting at home can improve mood and self-confidence.
- Simple supplies like white candles, dried flowers, wax paper, yarn, or twine are all you need to get started on projects.
- Step-by-step guides help make crafts like floral candles, lampshades, serving trays, and pinboards easy and fun.
- Personal touches in crafts can transform ordinary items into unique pieces of art.
- Crafting is a versatile activity with options for both adults and kids to enjoy together.
Table of Contents
1. DIY Floral Candles

Ignite your creativity along with a wick; DIY Floral Candles invite both warmth and style into any room.
This easy craft brings the delicate touch of nature inside, serving as a charming centerpiece or a thoughtful gift crafted by your own hands.
Materials Needed:
- Pillar candle or soy wax flakes
- Candlewick
- Wick holder or adhesive
- Heat-resistant container (if using wax flakes)
- Fragrance oil (optional)
- Dried flowers (e.g., lavender, rose petals)
- Clear adhesive or glue
- Wax dye or crayon (optional for coloring)
- Double boiler or microwave-safe container
- Stirring utensil
- Thermometer
- Craft scissors
- Parchment paper
- Heat gun or hairdryer (optional for smoothing the surface)
Step-by-Step Guide
Step 1: Prepare Your Work Area
- Cover your work surface with parchment paper to catch any wax drips. Gather all materials and ensure you have enough ventilation for the candle-making process.
Step 2: Set Up the Wick
- Place the wick in the center of the candle mold or container. Use a wick holder or adhesive to keep it in place. Ensure the wick is tall enough for the final height of your candle.
Step 3: Melt the Wax
- If using a pillar candle, skip this step. For wax flakes, melt them in a double boiler or microwave-safe container following the package instructions. Use a thermometer to monitor the temperature and avoid overheating.
Step 4: Add Fragrance and Color (Optional)
- If desired, add fragrance oil to the melted wax for a scented candle. You can also add wax dye or a crayon to achieve your desired color. Stir thoroughly to distribute evenly.
Step 5: Pour the First Layer of Wax
- Pour a small amount of melted wax into the container, covering the bottom and securing the wick. Allow it to cool and harden, creating a base for the dried flowers.
Step 6: Arrange Dried Flowers
- Once the first layer is slightly set but still tacky, arrange dried flowers on top. Press them gently into the wax, ensuring they stick well. You can create patterns or cover the entire surface.
Step 7: Pour the Remaining Wax
- Carefully pour the remaining melted wax into the container, covering the dried flowers. Leave some space at the top to avoid overflowing.
Step 8: Let the Candle Cool
- Allow the candle to cool and harden completely. This may take several hours. Trim the wick to the desired length.
Step 9: Smooth the Surface (Optional)
- Use a heat gun or hairdryer on low heat to smooth the surface of the candle if needed. Be cautious not to melt the dried flowers.
Step 10: Trim Excess Wick
- Trim the wick to about half an inch above the candle’s surface.
Step 11: Final Touches
- Inspect the candle for any imperfections or uneven surfaces. Make any necessary adjustments. Your DIY floral candle is now ready to use or gift!
Enjoy your beautifully crafted floral candle!
See the video below for more ideas.
2. Handmade Patterned Lampshade
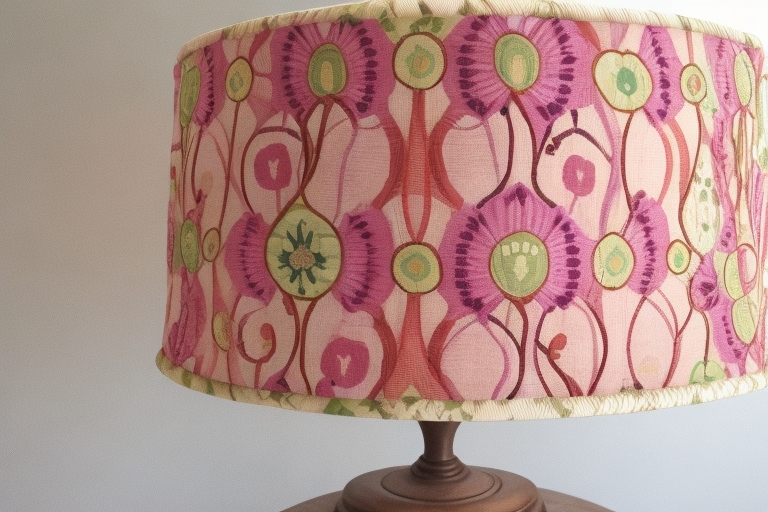
Illuminate your space with a touch of personality by crafting a Handmade Patterned Lampshade.
This is the perfect project to transform an ordinary lamp into a statement piece that reflects your unique style and adds warmth to any room.
Materials Needed:
- Lampshade frame
- Fabric (choose a light and breathable fabric for best results)
- Craft glue or fabric glue
- Paints or fabric markers
- Painter’s tape
- Paintbrushes or fabric markers
- Pencil
- Ruler or measuring tape
- Craft paper or newspaper
- Scissors
- Clothespins or paperclips
- Small bowl for paint
Step-by-Step Guide
Step 1: Prepare Your Workspace
- Cover your work surface with craft paper or newspaper to protect it from glue and paint. Ensure you have good ventilation in your workspace.
Step 2: Measure and Cut the Fabric
- Measure the height and circumference of the lampshade frame. Add an extra inch to both measurements for overlap. Cut the fabric to the required size.
Step 3: Plan Your Design
- Use a pencil to mark your design on the fabric lightly. This could be a repeating pattern, geometric shapes, or any design you prefer.
Step 4: Apply Painter’s Tape
- If you want clean lines in your design, use painter’s tape to mask off sections of the fabric. Press the tape firmly to ensure it adheres well.
Step 5: Apply Craft Glue
- Working in small sections, apply craft glue to the fabric where you want the paint to adhere. Ensure an even layer, but avoid using too much glue to prevent it from soaking through the fabric.
Step 6: Add Paint or Fabric Markers
- Apply paint or use fabric markers to color the exposed sections of the fabric. If using multiple colors, let each color dry before applying the next one.
Step 7: Remove Painter’s Tape
- Once the paint is dry, carefully peel off the painter’s tape to reveal crisp lines in your design.
Step 8: Continue the Design
- Repeat steps 4 to 7 until you have completed your entire design. Allow the paint to dry completely before moving on to the next step.
Step 9: Attach the Fabric to the Lampshade Frame
- Apply a thin layer of craft glue to the lampshade frame. Carefully attach the fabric to the frame, starting at one end and smoothing it down as you go. Use clothespins or paper clips to hold the fabric in place while the glue dries.
Step 10: Trim Excess Fabric
- Trim any excess fabric from the top and bottom of the lampshade, leaving a slight overlap. Fold this overlap over the frame and secure it with glue.
Step 11: Allow the Lampshade to Dry
- Leave the lampshade to dry entirely before placing it on your lamp.
Your DIY handmade patterned lampshade is now ready to add a unique touch to your home decor!
See the video below for more ideas:
3. Crafted Wooden Serving Tray
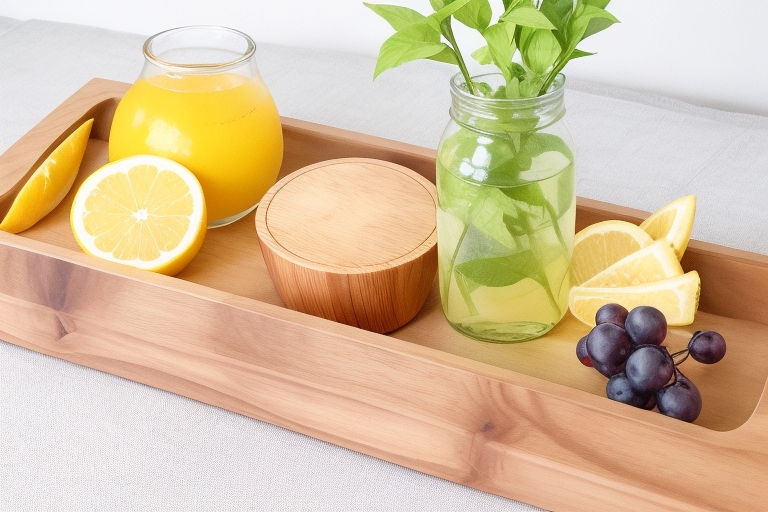
Elevate your hosting game with a chic, crafted wooden serving tray that’s not just functional but also a conversation starter.
It’s the perfect blend of rustic charm and elegance, turning any snack spread or coffee table into a display of your crafting prowess.
Materials Needed:
- Wooden board or plywood (cut to desired tray size)
- Sandpaper (various grits – coarse to fine)
- Wood stain or paint
- A wood sealant or clear varnish
- Handles (can be purchased or repurposed from an old tray)
- Measuring tape
- Pencil
- Ruler or straight-edge
- Painter’s tape (optional)
- Foam brushes or paintbrushes
- Screwdriver or drill
- Screws
- Wood glue
- Soft cloth for staining or painting
Step-by-Step Guide
Step 1: Prepare the Wooden Board
- Measure and mark the dimensions of your tray on the wooden board using a measuring tape, pencil, and ruler. Consider the size and shape you want for your tray.
Step 2: Cut the Wooden Board
- Using the marked lines as a guide, cut the wooden board to your desired tray size using a saw. If you don’t have the tools for cutting, you can have the board cut to size at a local hardware store.
Step 3: Sand the Edges and Surface
- Use sandpaper to smooth the edges and surface of the wooden board. Start with coarse grit sandpaper and gradually move to finer grits for a polished finish.
Step 4: Stain or Paint the Wood (Optional)
- If you want to add color to your tray, apply wood stain or paint using foam brushes or paintbrushes. Allow it to dry completely. You can use painter’s tape to create patterns or sections if desired.
Step 5: Apply Wood Sealant or Varnish
- Once the stain or paint is dry, apply a wood sealant or clear varnish to protect the wood. Follow the product instructions and allow it to dry thoroughly.
Step 6: Attach Handles
- Decide on the placement of the handles on each side of the tray. Mark the screw holes with a pencil. Use a drill or screwdriver to attach the handles securely to the wooden board.
Step 7: Optional Design Elements
- Get creative with additional design elements. You can stencil patterns, add decals, or even use decoupage to personalize your tray further.
Step 8: Allow the Tray to Cure
- After completing all steps, allow the tray to cure completely. This ensures that any finishes or adhesives are fully set.
Step 9: Clean and Polish
- Clean any excess stain, paint, or sealant from the tray. Polish the surface with a soft cloth to enhance the finish.
Step 10: Enjoy Your Handcrafted Wooden Serving Tray
- Your DIY-crafted wooden serving tray is now ready for use. Display it proudly, or use it to serve meals and drinks with style!
Feel free to adapt the design and finish to match your personal taste and home decor. Enjoy your handcrafted creation!
Explore more ideas by watching the video below:
4. Homemade Decorative Pinboard
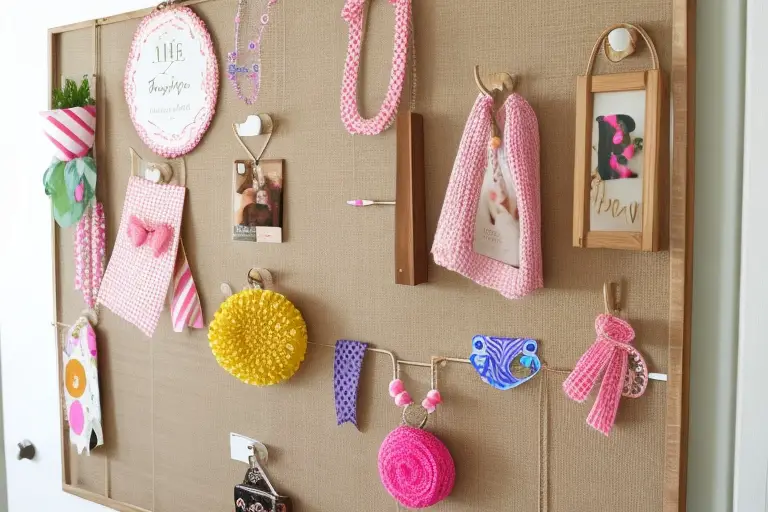
Transform your reminders and inspirations into art with a homemade decorative pinboard.
This easy-to-make piece not only organizes your space but also adds a personal touch to your home décor, reflecting your unique style and personality.
Materials Needed:
- Corkboard sheet or foam board
- Fabric of your choice (enough to cover the corkboard with some overlap)
- Batting or foam sheet (optional for extra padding)
- Ribbon or decorative trim
- Spray adhesive or craft glue
- Staple gun or heavy-duty glue
- Scissors
- Craft knife
- Pushpins or decorative pins
- Command strips or picture hangers (if not using a foam board)
- Ruler or measuring tape
- Pencil
Step-by-Step Guide
Step 1: Prepare the Corkboard or Foam Board
- Measure and mark the size you want for your pinboard on the corkboard or foam board using a ruler or measuring tape and a pencil.
Step 2: Cut the Corkboard or Foam Board
- Use a craft knife to carefully cut the corkboard or foam board along the marked lines. Exercise caution and make clean, straight cuts.
Step 3: Cut the Fabric
- Cut the fabric, leaving enough extra to wrap around the back of the corkboard or foam board. Ensure there is ample fabric to cover the edges.
Step 4: Add Padding (Optional)
- If you desire extra padding, cut a piece of batting or foam sheet to fit the size of the corkboard or foam board. Attach it using spray adhesive or craft glue.
Step 5: Attach Fabric to the Corkboard or Foam Board
- Lay the fabric flat, place the corkboard or foam board on top, and start wrapping the fabric around the back. Use spray adhesive or craft glue to secure the fabric in place.
Step 6: Secure the Fabric Edges
- Fold the fabric neatly around the edges, securing it to the back of the corkboard or foam board. Use a staple gun or heavy-duty glue to attach the fabric in place.
Step 7: Add Decorative Trim or Ribbon
- Use decorative trim or ribbon to embellish the edges of the pinboard. Attach it with glue or a staple gun, following the contour of the corkboard or foam board.
Step 8: Create a Hanging Mechanism (If Needed)
- If using a foam board, attach Command strips or picture hangers to the back for easy hanging. If utilizing a corkboard, you can lean it against a wall or connect it using adhesive hooks.
Step 9: Trim Excess Fabric and Secure Corners
- Trim any excess fabric on the back of the pinboard. Ensure that the corners are neatly secured, either with glue or staples, for a finished look.
Step 10: Allow the Pinboard to Dry Completely
- Leave the pinboard to dry completely before hanging or using it.
Step 11: Decorate with Pins
- Once the pinboard is ready, use pushpins or decorative pins to attach notes, photos, and other items.
Your homemade decorative pinboard is now ready to add a personalized touch to your space! Customize it with fabrics and trims that match your decor style.
5. Customized Fabric Switch Plates
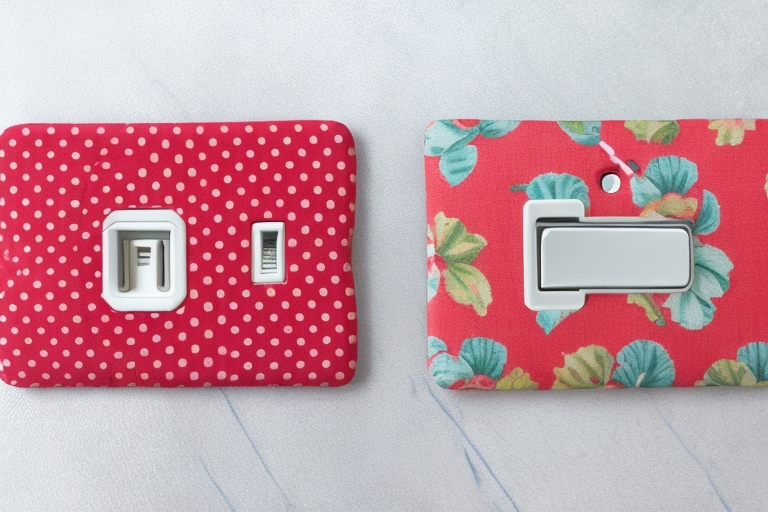
Give your home a unique touch with Customized Fabric Switch Plates, the perfect blend of functionality and style.
With creative fabric choices and some basic supplies, you’ll turn ordinary switches into eye-catching accents that showcase your flair.
Materials Needed:
- Blank switch plates (plastic or wooden)
- Fabric scraps or a single fabric sheet
- Mod Podge or decoupage glue
- Foam brush or paintbrush
- Scissors
- Craft knife or utility knife
- Ruler or measuring tape
- Pencil
- Fine-grit sandpaper (optional)
- Clear sealant spray (optional)
- Screwdriver (to remove and reattach switch plates)
- Painter’s tape (optional)
Step 1: Gather Materials and Plan Design
- Collect all the materials needed for the project. Choose a fabric that complements your room’s decor. Plan your design or pattern for each switch plate.
Step 2: Remove Switch Plates
- Use a screwdriver to remove the switch plates from the wall. This will make it easier to work on them and ensure a clean finish.
Step 3: Measure and Cut Fabric
- Measure the dimensions of the switch plate and add extra for wrapping around the edges. Cut the fabric pieces according to these measurements.
Step 4: Prepare the Switch Plates
- If the switch plates have a glossy finish, lightly sand them with fine-grit sandpaper to help the fabric adhere better. Wipe away any dust.
Step 5: Apply Mod Podge or Decoupage Glue
- Using a foam brush or paintbrush, apply a thin layer of Mod Podge or decoupage glue to the front of the switch plate.
Step 6: Attach Fabric
- Carefully place the fabric onto the switch plate, smoothing it out to remove any wrinkles or air bubbles. Make sure the fabric covers the entire surface.
Step 7: Trim Excess Fabric
- Use scissors to trim the excess fabric from around the edges of the switch plate. For curved areas, make minor cuts to help the fabric lay flat.
Step 8: Create Switch Holes
- Use a craft knife or utility knife to cut out holes for the switches and outlets carefully. Take your time to ensure clean and precise cuts.
Step 9: Wrap Fabric Around Edges
- Apply Mod Podge or decoupage glue to the edges of the switch plate and carefully fold the fabric over, securing it to the back. Smooth out any wrinkles.
Step 10: Optional Painter’s Tape for Clean Edges
- If you want clean lines, use painter’s tape along the edges of the switch plate before applying Mod Podge. Remove the tape after the fabric is secured.
Step 11: Seal the Fabric (Optional)
- To protect the fabric and enhance durability, you can spray the switch plate with a clear sealant spray. Follow the product instructions and allow it to dry completely.
Step 12: Reattach Switch Plates
- Once the switch plates are completely dry, use a screwdriver to reattach them to the wall.
Step 13: Enjoy Your Customized Fabric Switch Plates
- Admire your personalized switch plates and enjoy the unique touch they add to your room. Customize multiple plates for a cohesive look.
This DIY project allows you to add a customized and stylish element to your home decor with minimal effort.
6. DIY Woven Coasters
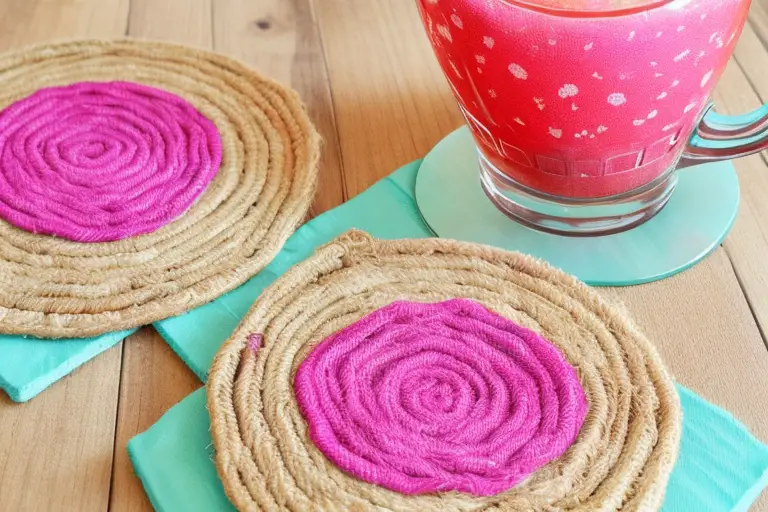
Get ready to elevate your coffee table with personalized charm!
Crafting DIY woven coasters is not only a fun way to spend an afternoon, but it also results in stylish protection for your surfaces that showcases your creativity and flair.
Materials Needed:
- Yarn in various colors
- Cardboard or foam board
- Scissors
- Ruler or measuring tape
- Pencil
- Craft glue or hot glue gun
- Craft needle
- Cork sheets or felt (for backing)
- Fabric glue (if using felt for backing)
Step-by-Step Guide
Step 1: Gather Materials and Choose Colors
- Collect all the materials needed for the project. Choose yarn colors that complement each other and match your decor.
Step 2: Create a Loom Template
- Cut a piece of cardboard or foam board to the desired size for your coasters. Use a ruler to mark evenly spaced notches along each side. These notches will serve as the anchor points for your yarn.
Step 3: Set Up the Loom
- Tie one end of the yarn to a notch at the top of the loom. Stretch the yarn vertically to the corresponding notch at the bottom and wrap it around. Continue this process, creating parallel lines of yarn across the loom.
Step 4: Begin Weaving
- Tie a different color of yarn to one end of the loom, creating a starting point for weaving. Begin weaving the yarn in an over-and-under pattern through the vertical strands of yarn. Push each row of yarn tightly against the previous row.
Step 5: Change Yarn Colors
- To add variety, change yarn colors as you weave. Tie the new color to the end of the previous one and continue weaving.
Step 6: Create Patterns (Optional)
- Experiment with different weaving patterns to create stripes, chevrons, or other designs. Be creative with color combinations.
Step 7: Finish Weaving
- Once you’ve reached the desired coaster size, tie off the yarn to a notch at the bottom of the loom. Cut off any excess yarn.
Step 8: Remove from Loom
- Carefully slide the woven piece off the loom. If using cardboard, you may need to cut the yarn along one edge to remove it.
Step 9: Secure Loose Ends
- Use a craft needle to weave any loose yarn ends back into the coaster, securing them in place. Trim excess yarn.
Step 10: Add Backing
- Cut cork sheets or felt to the size of your coasters. Apply craft glue or fabric glue to the back of the woven piece and press it onto the cork or felt. Allow it to dry completely.
Step 11: Trim Excess Backing
- If necessary, trim any excess cork or felt from around the edges of the coaster to create a clean finish.
Step 12: Make a Set
- Repeat the process to create a set of matching coasters. Experiment with different patterns and colors to add variety.
Step 13: Enjoy Your Handmade Woven Coasters
- Your DIY woven coasters are now ready to use! Arrange them on your coffee table or give them as thoughtful handmade gifts.
This project allows you to create unique and personalized coasters while exploring different weaving techniques and color combinations.
7. Crafted Faux Flower Coat
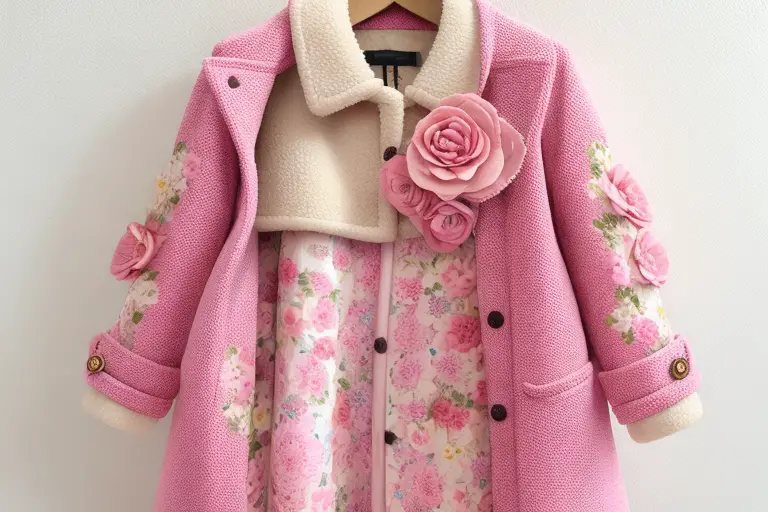
Transform an ordinary coat into a stunning statement piece with crafted faux flowers.
This unique project lets you play designer, bringing a touch of everlasting spring to your wardrobe that’s sure to turn heads and spark conversation wherever you go.
Materials Needed:
- Plain coat (preferably in a light color)
- Faux flowers (silk or fabric)
- Craft scissors
- Hot glue gun and glue sticks
- Felt fabric in a matching color
- Fabric adhesive or craft glue (optional)
- Ribbon or embellishments (optional)
- Tweezers (optional)
Step-by-Step Guide
Step 1: Gather Materials and Plan Design
- Collect all the materials needed for the project. Choose a coat with a simple design and a light color to allow the faux flowers to stand out. Plan the arrangement of flowers on the coat.
Step 2: Prepare Faux Flowers
- Use craft scissors to cut the faux flowers from their stems. Remove any excess plastic or fabric backing to create a flat surface for gluing.
Step 3: Arrange Flowers on Coat
- Lay out the coat and arrange the faux flowers in your desired pattern. Experiment with different placements until you are satisfied with the design.
Step 4: Glue Flowers to the Coat
- Heat the hot glue gun. One by one, apply hot glue to the back of each faux flower and press it firmly onto the coat. Be cautious with the hot glue to avoid burns. Use tweezers to hold smaller flowers if needed.
Step 5: Add Dimension and Layers
- Layer the flowers to add dimension to your design. Consider overlapping some flowers or placing them at different angles. This will create a more visually exciting and textured look.
Step 6: Fill in Gaps
- Fill in any gaps between the flowers with smaller blooms or additional petals. Ensure that the entire surface of the coat is covered, creating a cohesive and balanced design.
Step 7: Create Felt Backing (Optional)
- Cut pieces of felt fabric to fit the back of each flower. Apply a small amount of fabric adhesive or craft glue to the back of the flower and press the felt in place. This adds extra stability and prevents the flowers from sagging.
Step 8: Add Ribbon or Embellishments (Optional)
- If you desire, enhance your faux flower coat by adding ribbon accents or other embellishments. Attach these with hot glue or fabric glue.
Step 9: Allow the Glue to Dry Completely
- Allow the hot glue to dry completely before handling the coat. This ensures that the faux flowers are securely attached.
Step 10: Inspect and Reinforce (Optional)
- Inspect the coat for any loose flowers or areas that may need reinforcement. Use additional hot glue to secure any loose elements.
Step 11: Wear and Enjoy Your Faux Flower Coat
- Your DIY-crafted faux flower coat is now ready to wear and showcase your unique style. Enjoy the attention and compliments it brings!
This project allows you to transform a plain coat into a statement piece with a touch of floral elegance.
Experiment with different flower sizes, colors, and arrangements to achieve the look that best suits your taste.
8. DIY Marbled Mugs
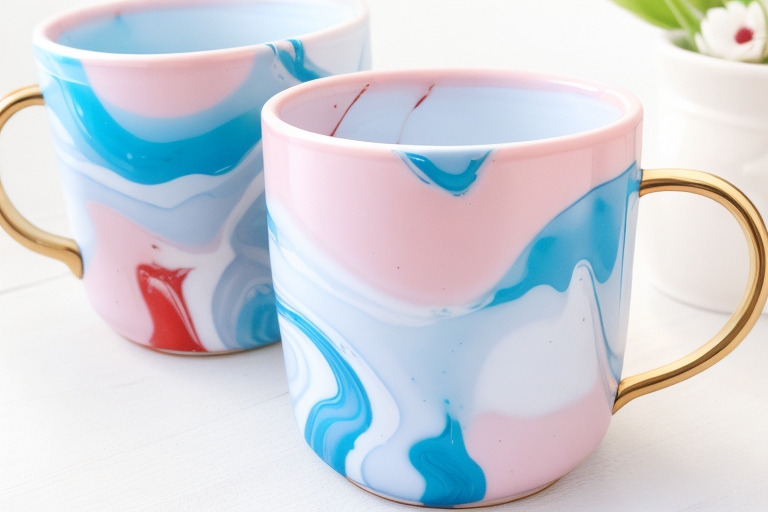
Prepare to transform your morning coffee routine with a splash of color and creativity – it’s time for DIY marbled mugs.
With just a few essential materials, you can swirl your way to a masterpiece that makes each sip feel like a brushstroke of your very own art show at home.
Materials Needed:
- Plain ceramic or porcelain mugs
- Nail polish in various colors
- Disposable container or bucket
- Toothpicks or skewers
- Protective gloves
- Nail polish remover
- Cotton swabs or cotton balls
- Clear sealant spray (optional)
- Masking tape (optional)
Step-by-Step Guide
Step 1: Gather Materials and Prepare Workspace
- Collect all the materials needed for the project. Ensure you are working in a well-ventilated area and cover your work surface with newspaper or a disposable tablecloth.
Step 2: Fill Container with Water
- Fill a disposable container or bucket with lukewarm water. The water should be deep enough to submerge the entire mug.
Step 3: Add Nail Polish
- Open the nail polish bottles and drop a few drops of each color onto the surface of the water. Create a pattern by adding drops of different colors.
Step 4: Swirl the Nail Polish
- Use a toothpick or skewer to swirl the nail polish on the water’s surface. Create a marbled pattern by dragging the colors around. Work quickly before the polish starts to set.
Step 5: Dip the Mug
- With gloves on, carefully dip the mug into the water, ensuring the surface gets fully submerged in the marbled nail polish pattern. Rotate the mug slightly to pick up more color.
Step 6: Remove Excess Polish
- Pull the mug out of the water and let the excess nail polish drip off. Use a toothpick or skewer to remove any excess polish from the water’s surface.
Step 7: Clean the Mug’s Rim
- Wipe the rim of the mug with a cotton swab or cotton ball dipped in nail polish remover to remove any nail polish residue.
Step 8: Allow the Mug to Dry
- Place the mug on a protected surface to dry completely. This may take a few hours. Avoid touching the marbled surface while it dries.
Step 9: Optional: Add a Second Dip (Optional)
- If you want a more layered look, allow the first layer to dry completely. Then, repeat steps 3-8 with a different color combination, dipping the mug again.
Step 10: Seal the Design (Optional)
- If you want extra protection for the design, mainly if the mugs will be used for drinking, you can spray the marbled mugs with a clear sealant spray. Follow the product instructions and allow it to dry thoroughly.
Step 11: Optional: Masking Tape for Clean Edges (Optional)
- If you want clean edges on your marbled pattern, you can use masking tape to cover parts of the mug before dipping. Remove the tape after the final dip and before the polish dries.
Step 12: Cure and Enjoy
- Allow the mugs to cure for 24-48 hours before using or washing them. Once healed, your DIY marbled mugs are ready to manipulate and display.
This project allows you to create unique and personalized marbled patterns on your mugs, making them stand out and adding a touch of creativity to your drinkware.
Essential Tools and Supplies for DIY Crafting
Must-Have Tools for DIY Crafting:
- Scissors: High-quality scissors are essential for cutting various materials such as paper, fabric, and thread.
- Craft Knife/Utility Knife: Ideal for precision cutting, especially for intricate designs and fine details.
- Cutting Mat: Protects surfaces while cutting and provides accurate measurements for precise crafting.
- Ruler/Measuring Tape: Essential for measuring and ensuring accuracy in your projects.
- Hot Glue Gun: Versatile adhesive for bonding materials quickly. Applicable for various crafts and DIY projects.
- Glue and Adhesives: Different types, including craft glue, super glue, and fabric glue, are used for various materials and projects.
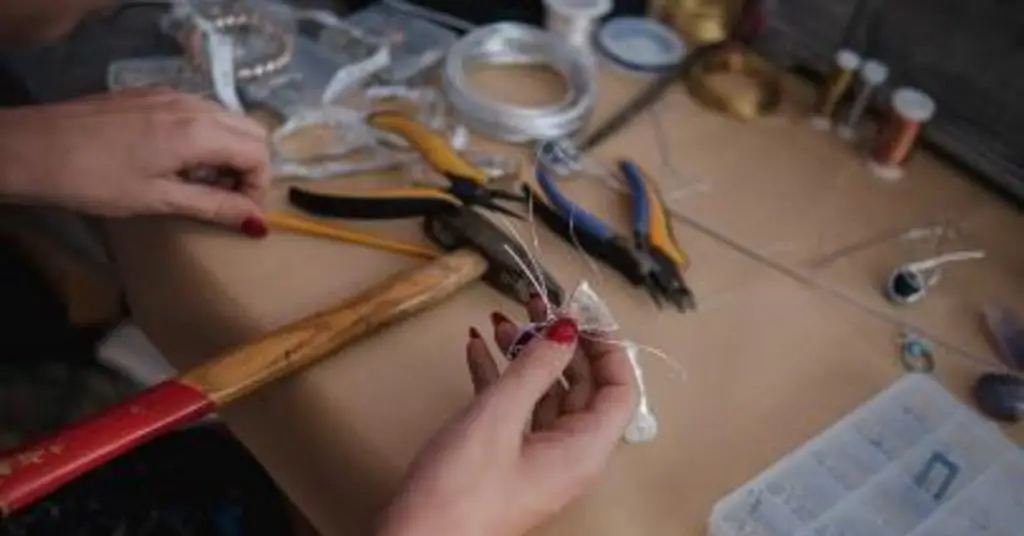
- Pliers: Useful for bending, shaping, and cutting wires or other craft materials.
- Needle-nose Pliers: A more precise type of pliers for detailed work, especially with small components.
- Wire Cutters: Specifically designed for cutting wires cleanly and efficiently.
- Crafting Brushes: Various brushes for painting, applying glue, or adding details to your projects.
- Paint Palette: For mixing and holding different colors of paint during your crafting sessions.
- Crafting Scissors: Specialized scissors with different blade shapes for specific cutting needs.
- Crafting Tweezers: Handy for picking up and placing small items, beads, or intricate components.
- Crafting Mat: Protects surfaces from spills, glue, and other potential damage during crafting.
- Sewing Machine: If you engage in sewing projects, a sewing machine can save time and provide professional-looking results.
- Embroidery Hoops: Essential for embroidery and cross-stitch projects, keeping the fabric taut.
- Cutting Shears: Heavy-duty scissors for cutting through thicker materials like leather or heavy fabric.
Must-Have Supplies for DIY Crafting:
- Assorted Papers: Different types and colors of paper for various crafting projects, including cardstock, construction paper, and specialty paper.
- Assorted Fabrics: A variety of fabrics for sewing, quilting, or fabric-based crafts.
- Paints: Acrylic, watercolor, or fabric paints for adding color to your projects.
- Markers/Pens: For drawing, outlining, or adding details to your crafts.
- Ink Pads: Handy for stamping projects and creating various textures.
- Glitter and Sequins: Adds sparkle and texture to your crafts.
- Mod Podge/Decoupage Medium: Versatile adhesive and sealant for various crafting projects.
- Stencils: Useful for creating consistent patterns and designs.
- Craft Paper Punches: Punches in different shapes for creating decorative edges and embellishments.
- Buttons, Beads, and Charms: Decorative elements to add texture and interest to your projects.
- Embroidery Floss and Threads: For hand-sewing, embroidery, and other textile crafts.
- Ribbons and Trim: Adds a finishing touch to various projects, such as gift wrapping and fabric crafts.
- Clear Sealant Spray: Protects and seals finished projects, especially those involving paint or delicate materials.
- Craft Foam: Great for adding dimension and structure to projects.
- Styrofoam Balls: Useful for various crafting projects, including DIY ornaments and models.
- Safety Gear: Depending on your projects, safety gear like gloves and safety glasses may be necessary.
- Storage Containers: Keep your supplies organized and easily accessible.
- Crafting Books and Magazines: Provide inspiration, tutorials, and ideas for new projects.
Having a well-equipped crafting space with these tools and supplies will help you tackle a wide range of DIY projects with creativity and ease.
Final Thoughts on DIY Craft Ideas
Get your crafting groove on with these 10 DIY ideas! Whether you’re sprucing up the house or making gifts, there’s something for everyone.
Dive into projects like custom photo collages and marbled mugs to add a personal touch to your space.
Remember, crafting is not just fun; it boosts mood and confidence too. So grab those supplies and start creating today!
FAQs for DIY Craft Ideas
1. What are some easy DIY crafts I can make at home in 2024?
There’s a world of crafts to explore! From creating an accent wall with homemade art to trying your hand at macrame, you can find step-by-step how-to guides that make starting new projects a breeze.
2. Can touch device users easily follow along with these craft ideas?
Absolutely! These DIY guidelines are crafted so that when you swipe on your screen, the steps are clear and simple to follow—even if you’re all thumbs!
3. Where can I get the materials for these adult craft projects?
You might find just what you need around the house or with a quick online search. Some sites might have affiliate links that lead straight to all the goodies required for your next masterpiece.
4. Is it okay if I’ve never done any crafts before?
Sure thing! The beauty of these DIY ideas is that they come with detailed instructions perfect for beginners—you’ll be crafting like a pro in no time!


Leave a Reply